| < Previous page | Next page > |
|
Entering Sections
A grading job often needs to be broken down into a number of smaller pieces. We are defining this smaller piece as a Section. If no sections are present Ezigrade assumes you are referring to the whole job.
Important: If all the data points are to be used then nothing else needs to be done.
In Ezigrade a section consists of a series of links (straight lines) that define the Field edges. Each of these edges or links contains 2 Nodes that define the end points of these links.
Entering Section Edges
The designer needs to work out the layout of the sections to minimize the cut and fill while keeping the number of sections to a minimum. We suggest you learn to use the contours to guide in the layout of your fields.
To create a section do the following. Click on the “Sections” menu item and then “Insert Section Edges”. Move cursor to the initial point and then press left mouse button, move to the next point and again click. Keep repeating the process and you will observe a polyline is being created. To close the section click the last point over the top of the initial point. To finish the process then hit the “Enter” button. If you wish to discard all the section edges entered simply click on the escape button.
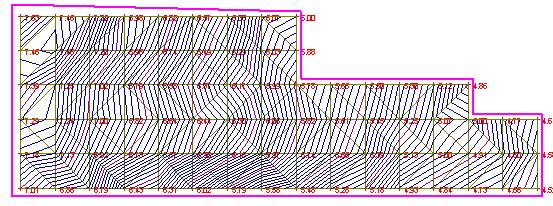
If you are simply creating a single closed section then the above will do. The picture below shows the section lines which you could draw around the job if the whole job consists on only one section.
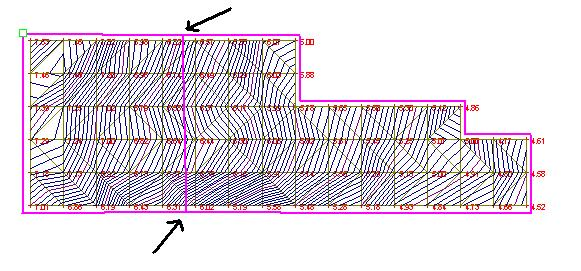
However you can also start a section on an existing node or along an existing edge or link. You can also finish on a node or existing link. This way you can build up an interconnected network of sections that define a number of sections. In this example we wish to split the job into two sections, a left and a right. We have drawn in a new section line from about the bottom middle of the job to the top of the job. Simply start the line on an existing line and finish on an existing line. Ezigrade will automatically snap points on the existing line and create a new node.
Modifying Section Edges
To delete a link or edge simply left click on it. It will be highlighted. To delete then press the “delete” button. To cancel the deletion after selection press the escape key. To delete a node or point on the edge click on it. It gets displayed as a green square. Once highlighted either press “Delete” or the “Esc” key.
To change the shape of the section is really quite simple. Click on a node – it will be highlighted as a green square. Left click on this node and while keeping the left button depressed move the mouse. The node and any edges that are joined to it are moved. For example if this point was common to 4 sections then the shape of all 4 sections is changed.
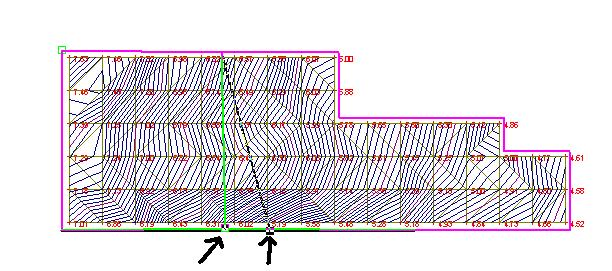
In this example we are moving the node middle center to the right. You will notice that all the appropriate links/lines move with it.
Defining a Field
To define a section left click on each link that goes into making up the section. Once they are all selected right click the mouse. A menu pops up and select the “Insert a Section” option. The new section is created and the heading displays on the screen as confirmation. The new section will also be added to the section list which can be accessed from the windows combo box at the left of the screen. Add in the “section description”, “cut/fill” ratio and “borrow” as required.
Deleting a Section
To delete a section make sure the section is displayed in the section list combo box. Then simply hit the delete key.
These above controls allows you to initially define and simply modify the layout of any sections that comprise the job.
|