In this tutorial we will go through the procedure of opening a new file. Clicking in some data from a dwg and creating a report.
Creating a new file:
We have been given a DWG and we wish to check that the bearings and distances shown on the drawing close to within tolerance's. We have a file called "miscloseapp_example.dwg".
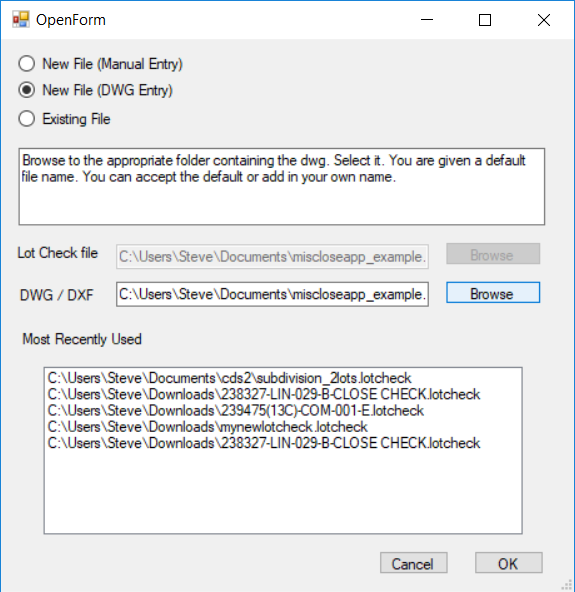
Click on the "miscloseapp" from the desktop. We have a blank screen with a menu. Click on File -> Open
|
|
Click on the Browse button. Change the browser to the documents folder and click on the misclose_example.dwg entry.
The dwg name is entered into the DWG/DXF entry box.
Now click on the OK button. MicloseApp creates a new file called miscloseapp_example.lotcheck. This file contains a link to the original DWG file.
If you move the files around; make sure that you keep the "lotcheck" and the "dwg/dxf" file in the same folder.
|
We now have the following shown:
This file was created by 12D and the relevant data is shown in a paper-space. A typical file created by CDS has the appropriate data in the model space. So depending on where the file was created affects whether you need to open a paper space latout.
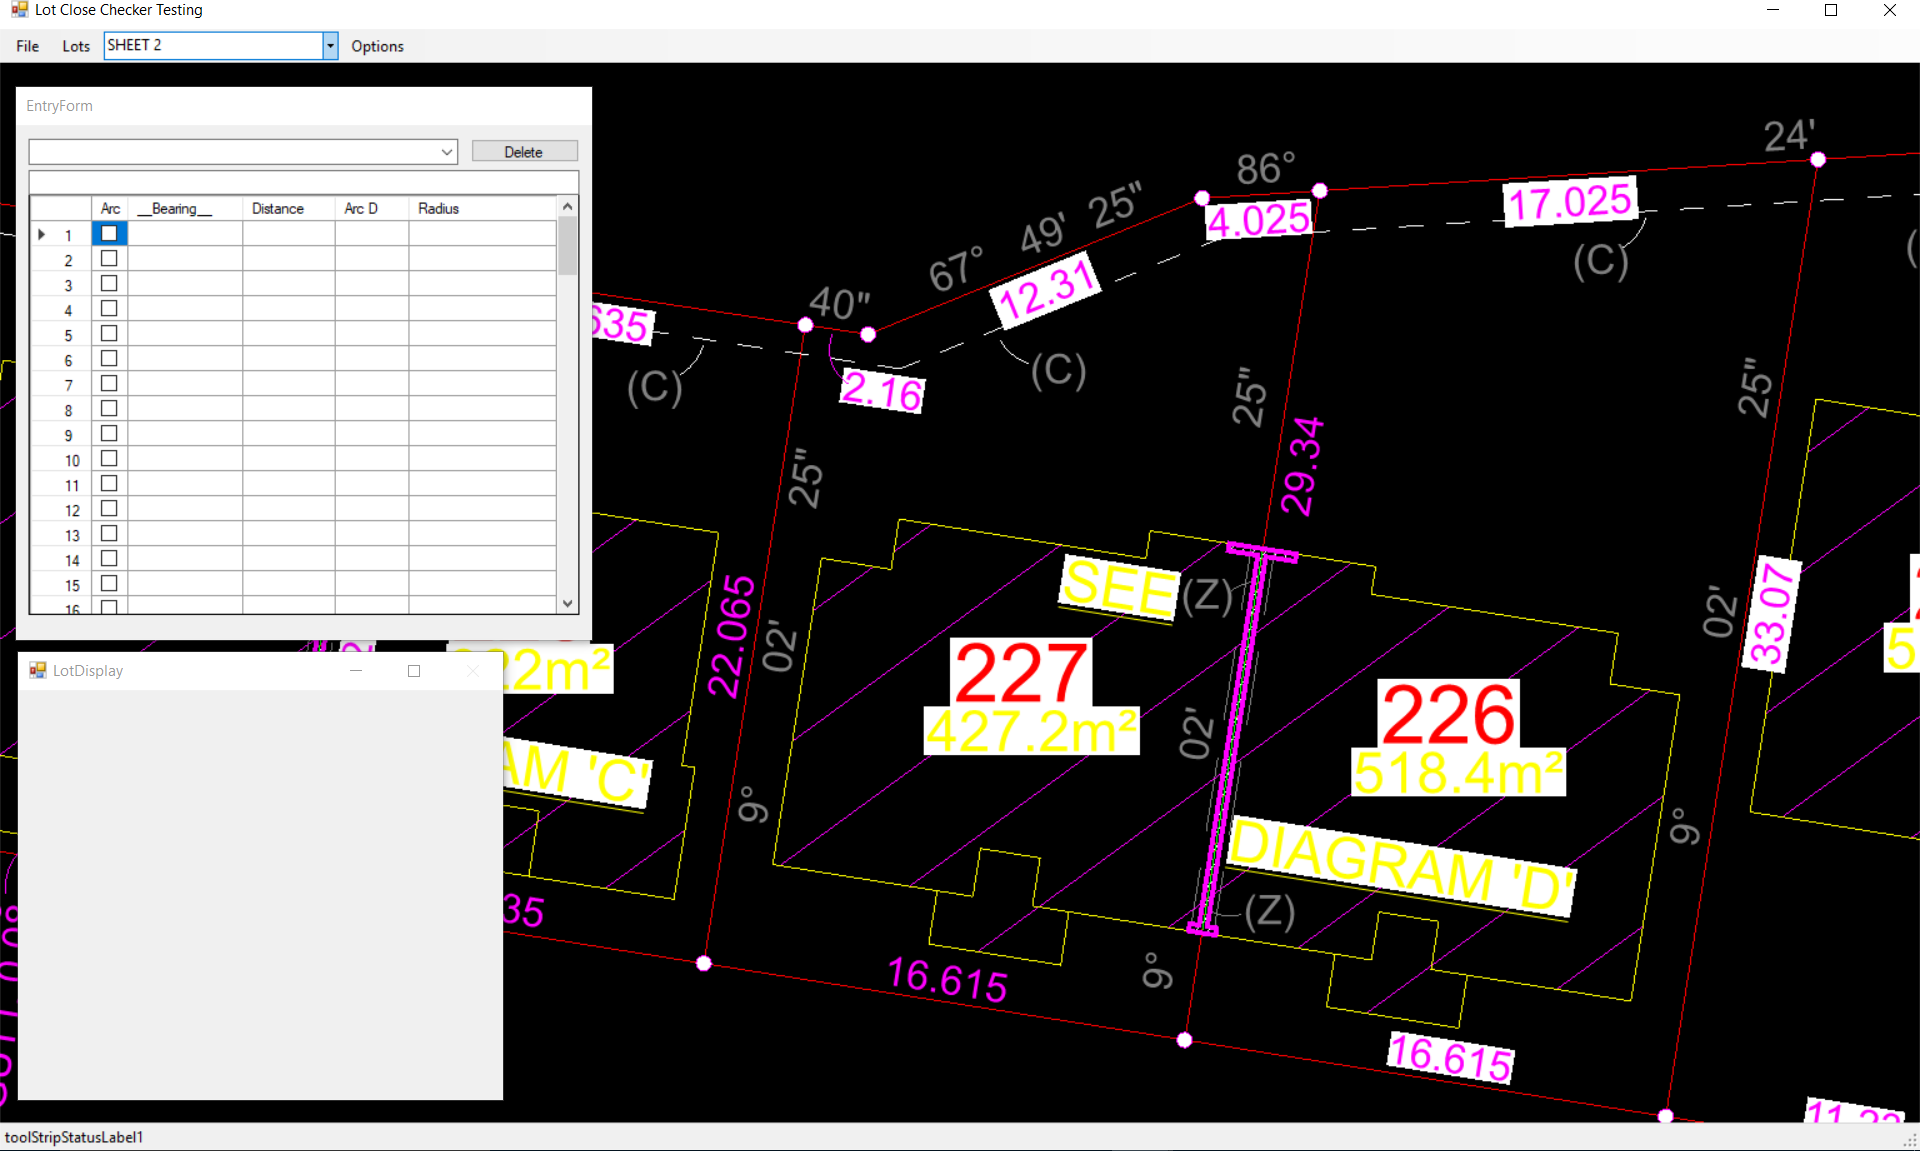
The combo box on the 2nd top line contains the appropriate model/paper spaces. In this job we click into the combo box and select the "Sheet2" layout. We have the following displayed:
Again "EntryForm" and "LotDisplay" are still both empty.
Entering Lot Data
We now wish to click in the data for Lot227. Zoom up this part of the screen using your mouse. Holding down the middle button and dragging does a pan. Scrolling the middle button does a dynamic zoom. ie we have the following:
The procedure to click in a lot is:
-
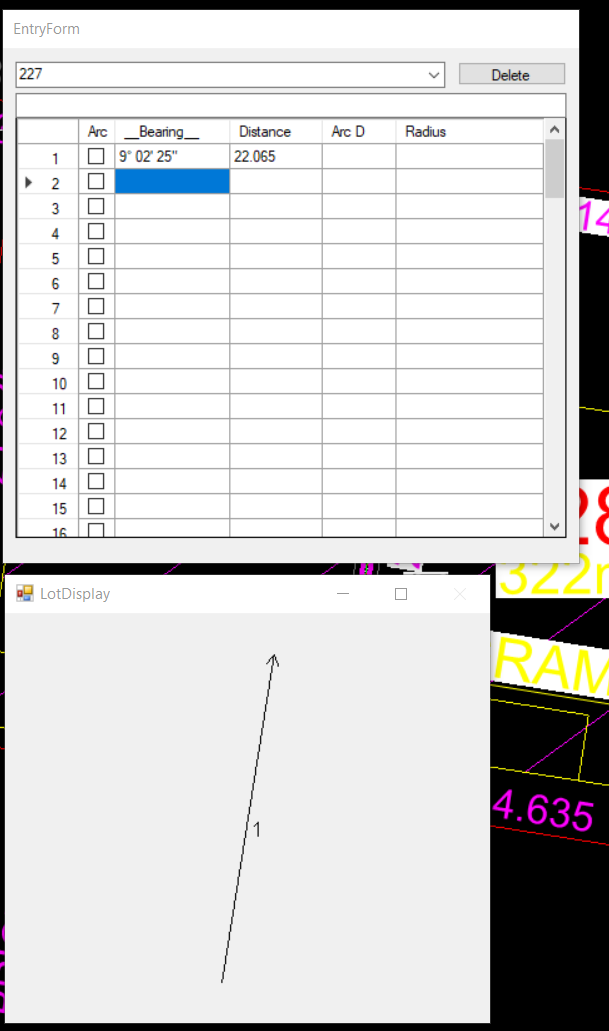
Click on Lots -> New. You are asked to click on the lot name. Click on "227"
-
the app now moves to the "bearing" entry.
-
The app needs you to click in the data in either clockwise or anticlockwise order
-
click on the bearing "9~02'25" (we can start on any line)
-
click on the distance 22.065
-
click on 98~33'40" click on distance 2.16
-
repeat all the way around the lot
|
Clicked in the first line
|
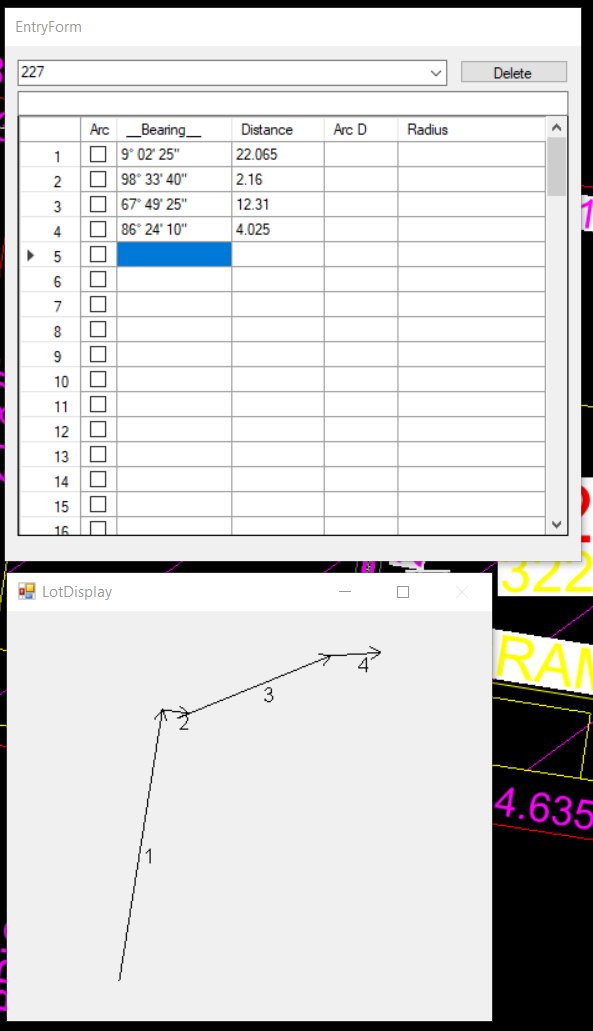
Clicked in 4 lines
|
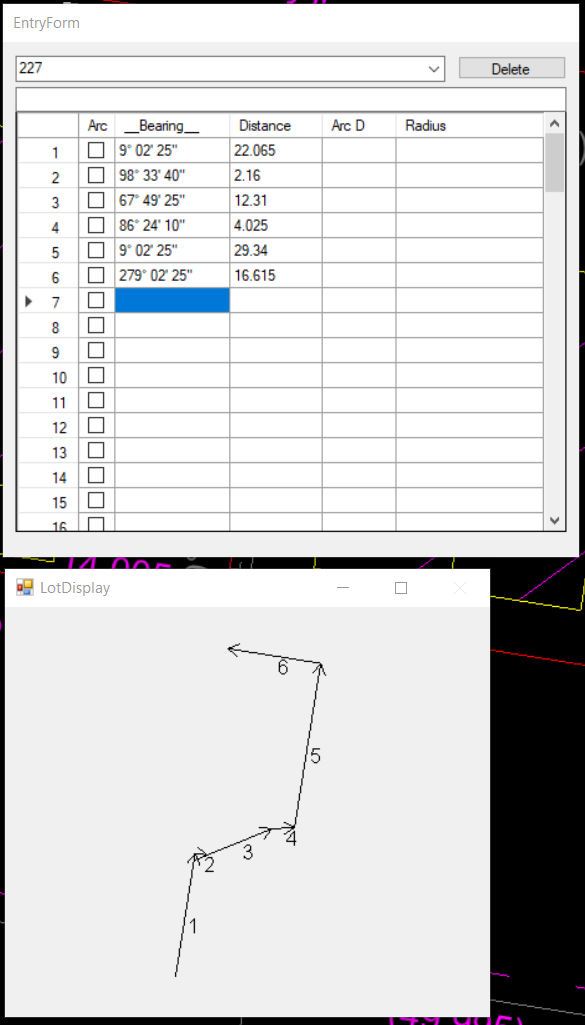
Entered all the lines
|
|
|
|
|
You can type c at anytime any the area, misclose distance and bearing are displayed. However when you do this we have an obvious problem. The LotDisplay dialog also shows an issue. You can see that line 5 is obviously heading in the wrong direction. When we clicked in these values we are assuming that we entered in a clockwise direction. So line 5 should be heading down the page. However the bearing shown is assuming we are looking up the page.
|
|
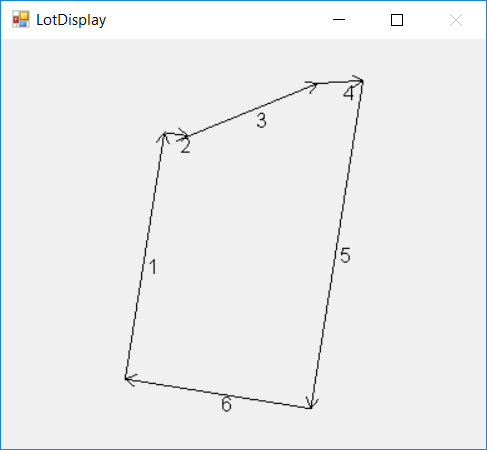
There are two ways of correcting this. We can click into the "EntryForm" at line 5 and bearing entry. When there hit the r key and the value is reversed. Alternatively simply click into the "LotDisplay" on the wrong line. It is automatically reversed and misclose is calculated.
We have entered our first lot.
We now repeat the process for the other lots.
|
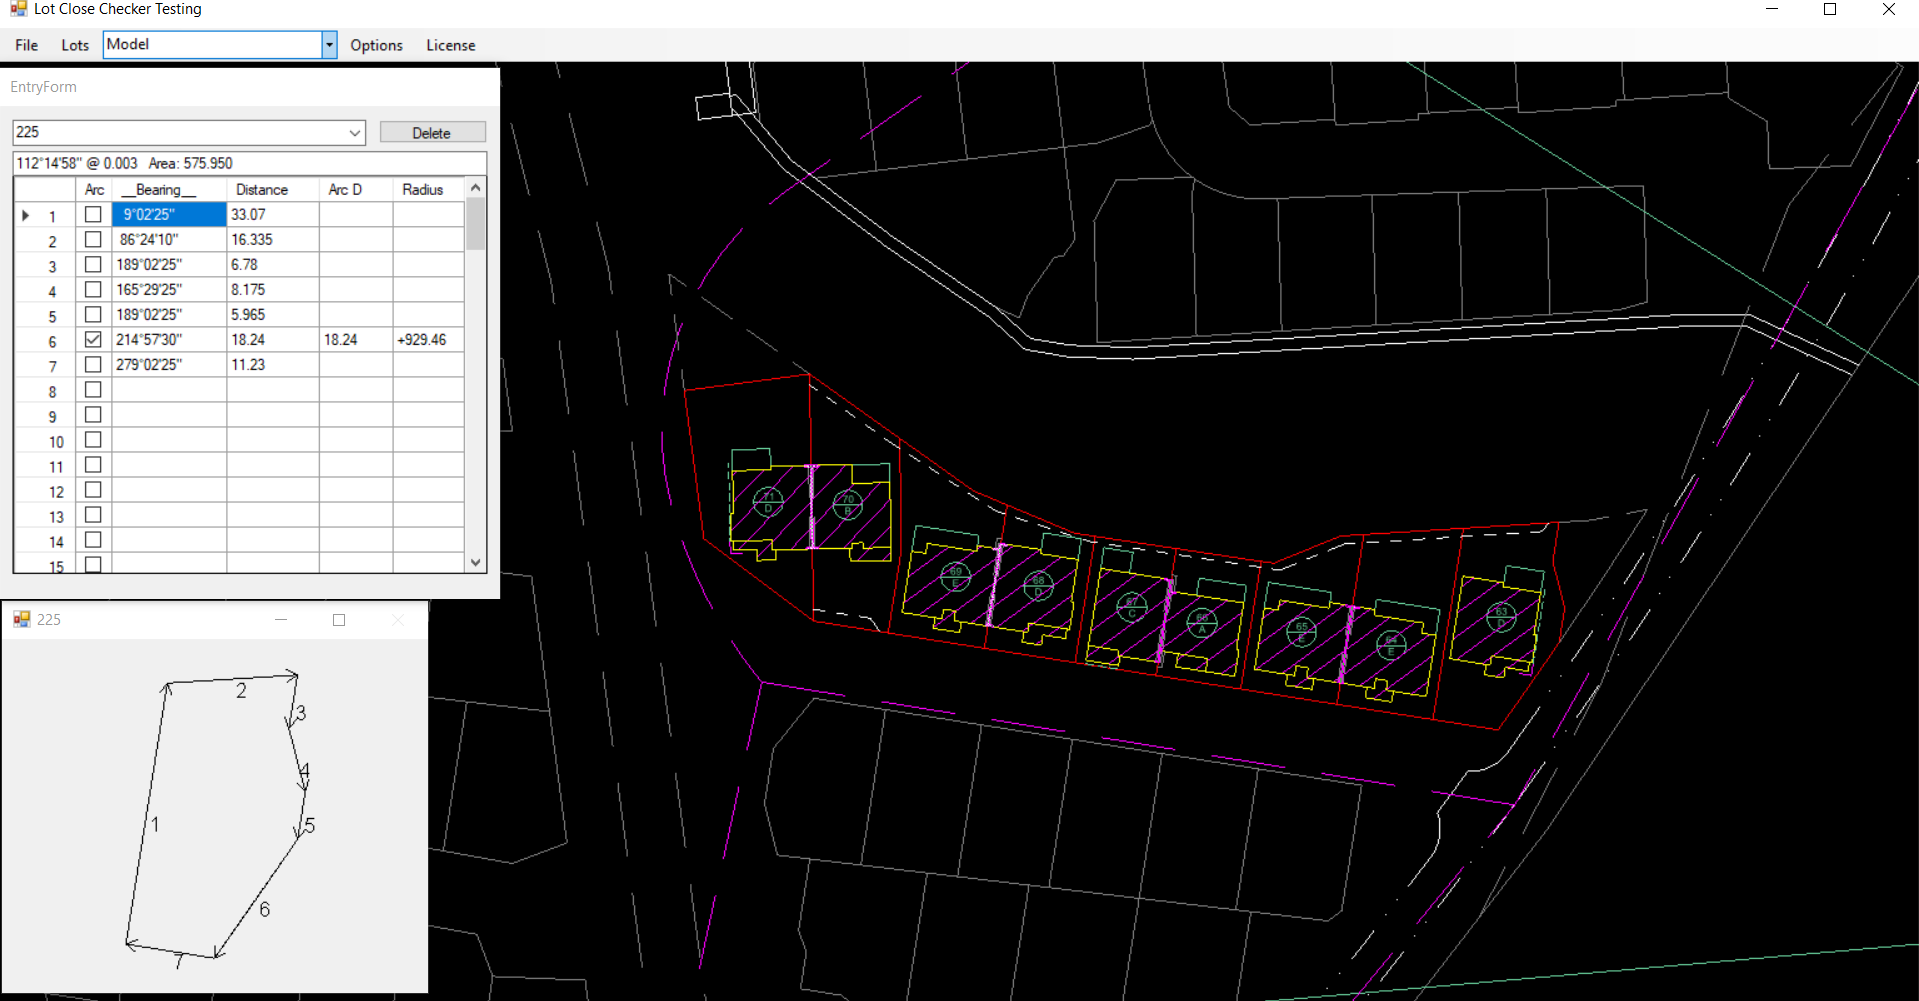
Arc Entry
If we have an arc entry then first click on the "arc" tick box in the EntryForm. The app now expects an arc distance and a radius. Click in the chord bearing, chord distance, arc distance and radius in order. The arc can be either clockwise or anticlocwise. A clockwise arc is defined as a +ve readius while a anti-clockwise are is defined as a negative distance. Again you can click into the radius entry and simply type r to reverse the direction. You can also click on the arc shown in the "LotDisplay" and it is automatically reversed.
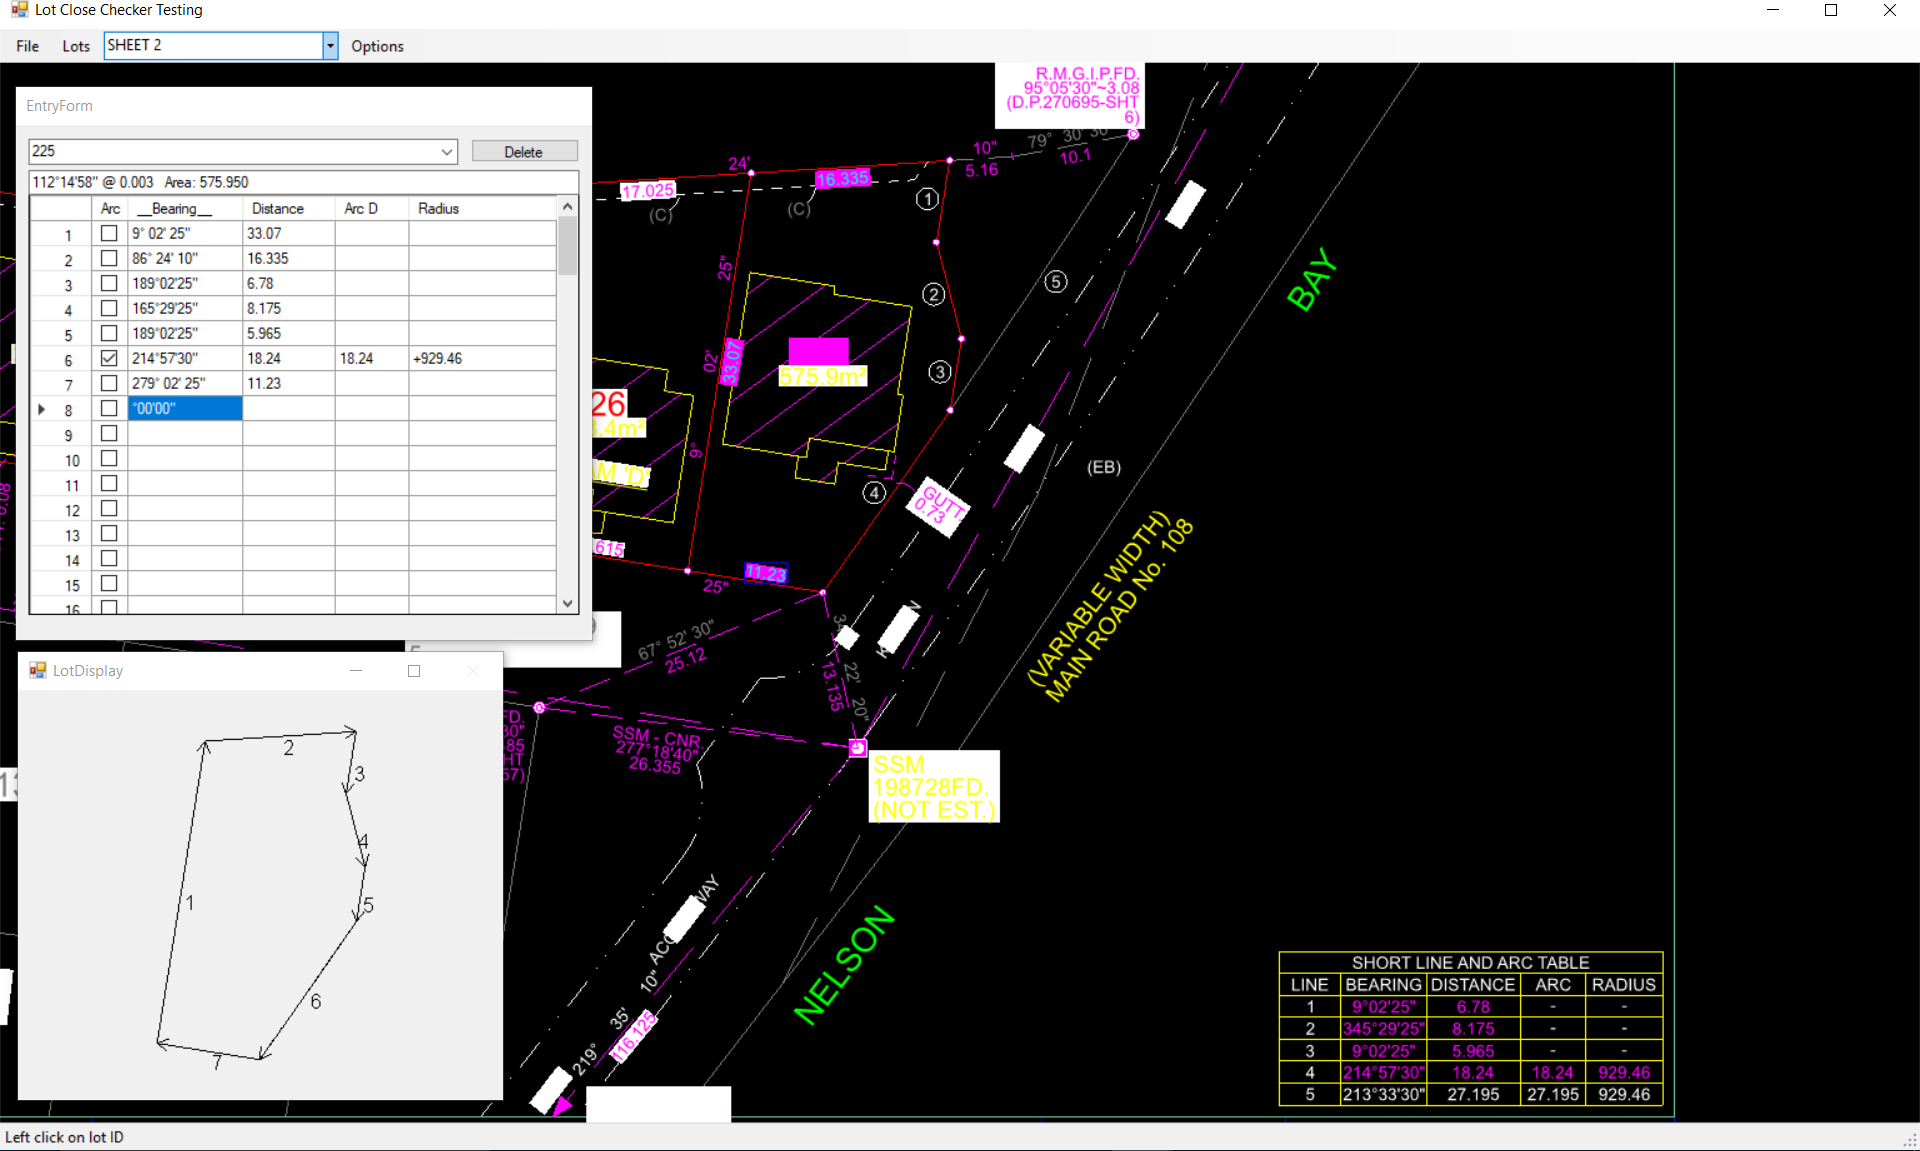
If we have an arc that is shallow then the "LotDisplay" will ask whether you are reversing the chord bearing or reversing the arc. Here is how we would enter Lot225 in the drawing below. Please note that we have clicked in some of the values from the short line and arc table.
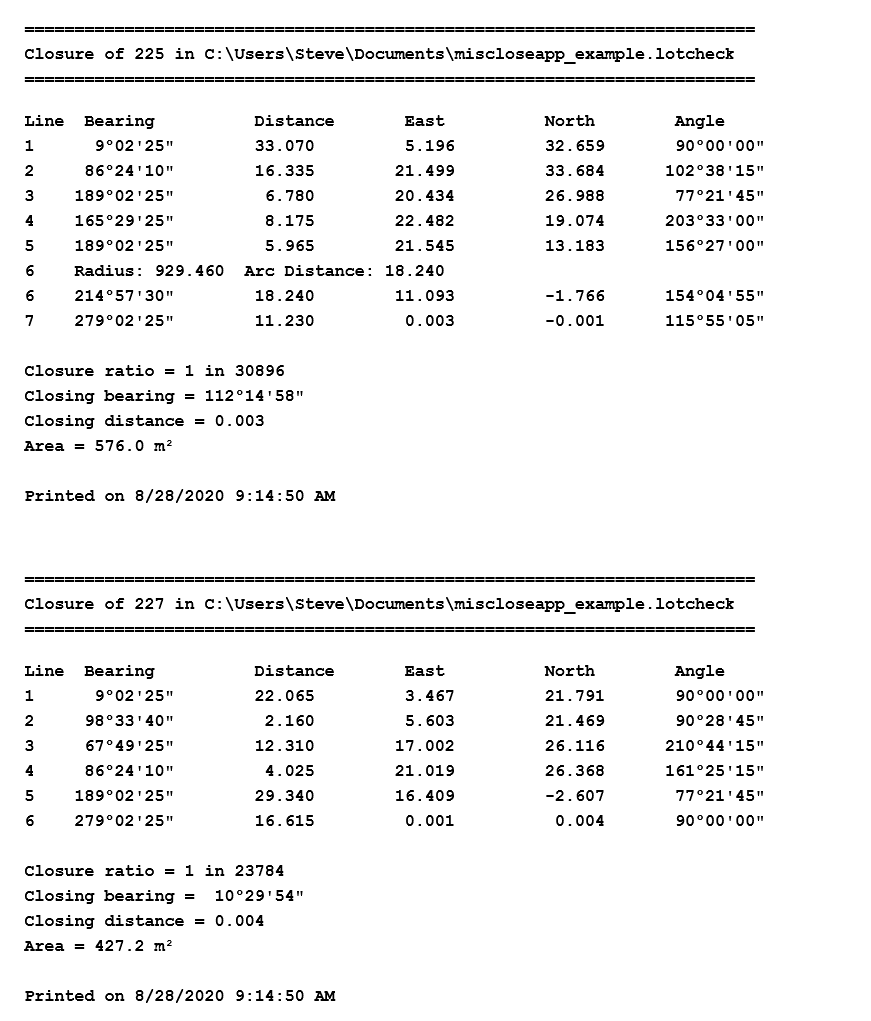
Report Generation
To generate a report we click on the File -> Report option. A PDF report is generated and displayed.
If a lot is out of tolerance then it is displayed in a "lighter shade of pale". The tolerance can be user set. Click on Options -> Tolerance.
We have the following pdf created for this job:
To close the job click on the X button top right hand corner.