| < Previous page | Next page > |
All Way design comparison with outlet
Ezigrade has three types of grading designs. We have the traditional plane design, a constrained grade solution where the grading can vary between limits and what we call an AllWay design. This is a depression filling algorithm often used in the GIS community that makes all the water flow to the edge of the job. The procedure is to first pass a filter over the surface to smooth out hills and hollows etc. Then a back filling algorithm is applied to either fill in or drain or both to any ponding area to a minimum grade. Unlike the constrained grade solution the back filling / draining algorithm does not always result in a minimum solution. So it is possible that absolute volumes could be higher than a totally user designed system. However the procedure is certainly less involved and it may be easier to take the computer generated solution.
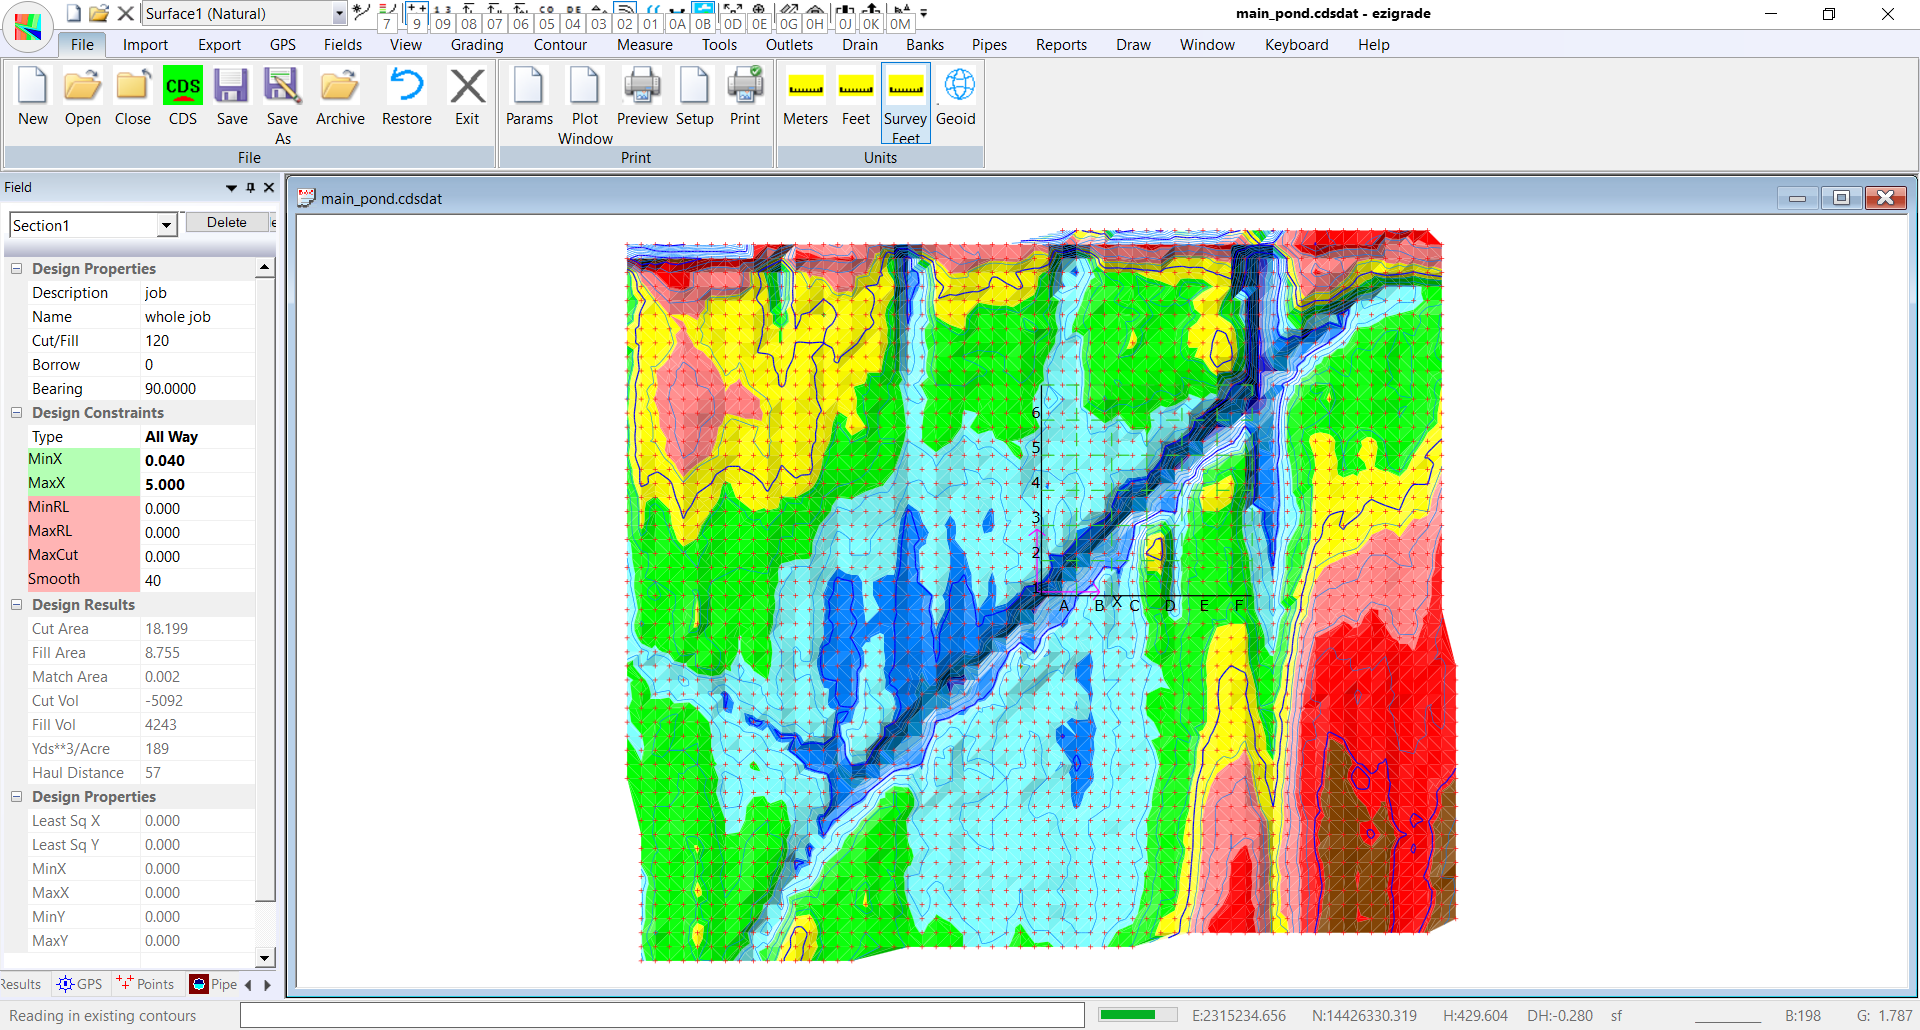
We have the following job. It has been previously designed with drains which have been choked off at their entrances.
You can see the low points and can envisage that after rainfall there would be quite extensive ponding.
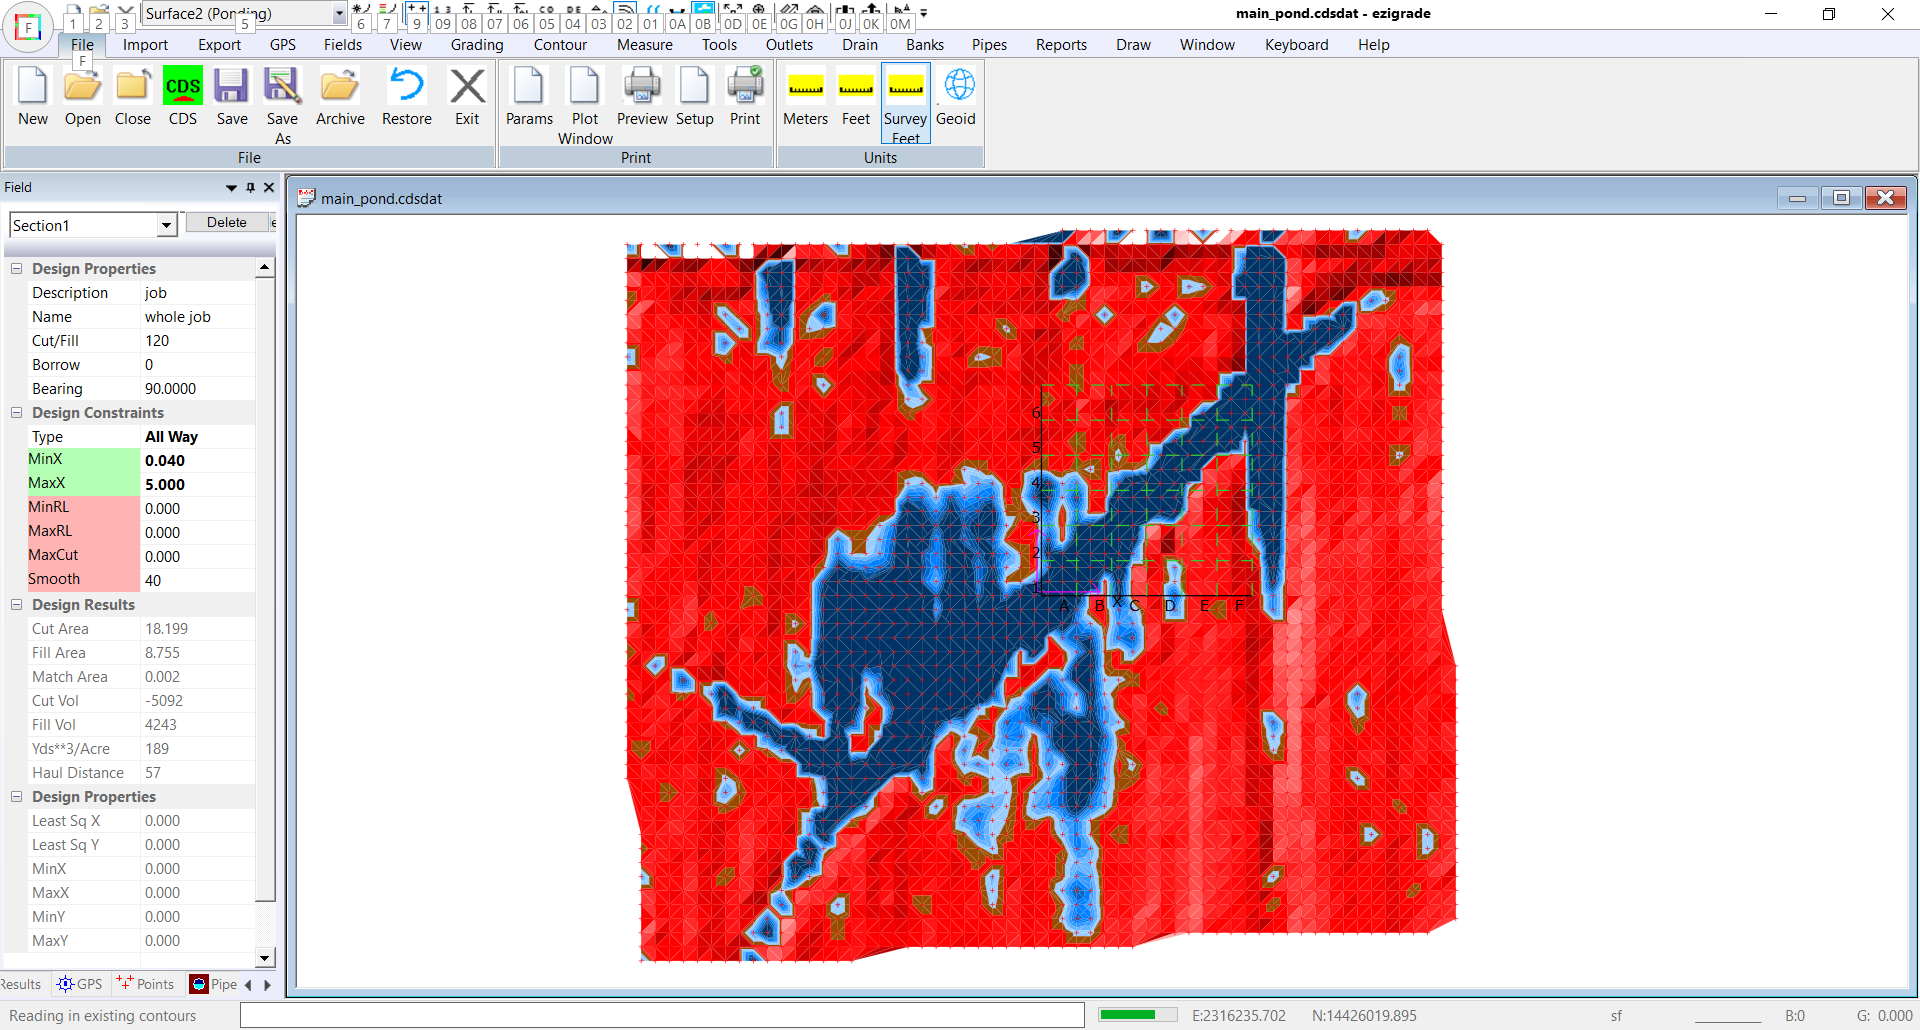
To visually see the ponding. Go to Contour -> Surface Parameters and click on "Add". Hit the reset button lower right and ponds are calculated and pond heights set. From contour menu do a contour -> form model. Then go to Contour -> Surface Colors and make display the surface colors. We have a view like this:
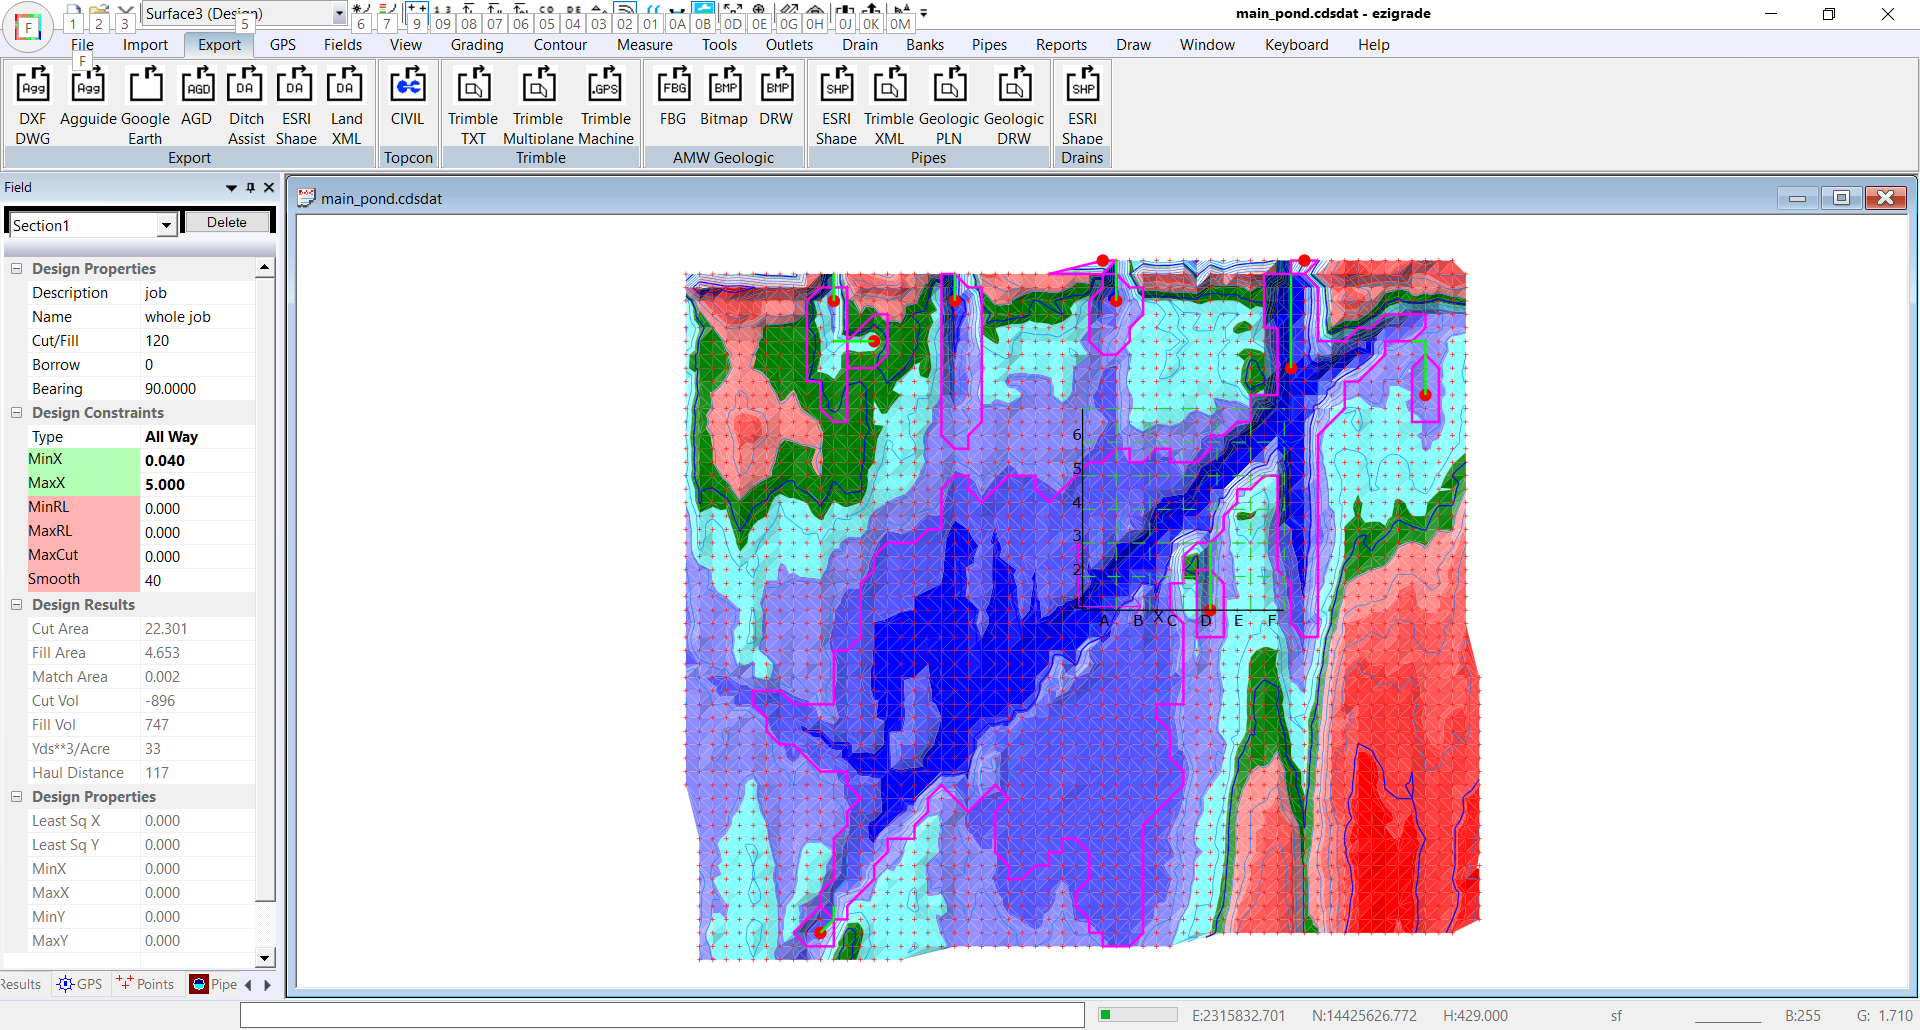
 Design using back filling
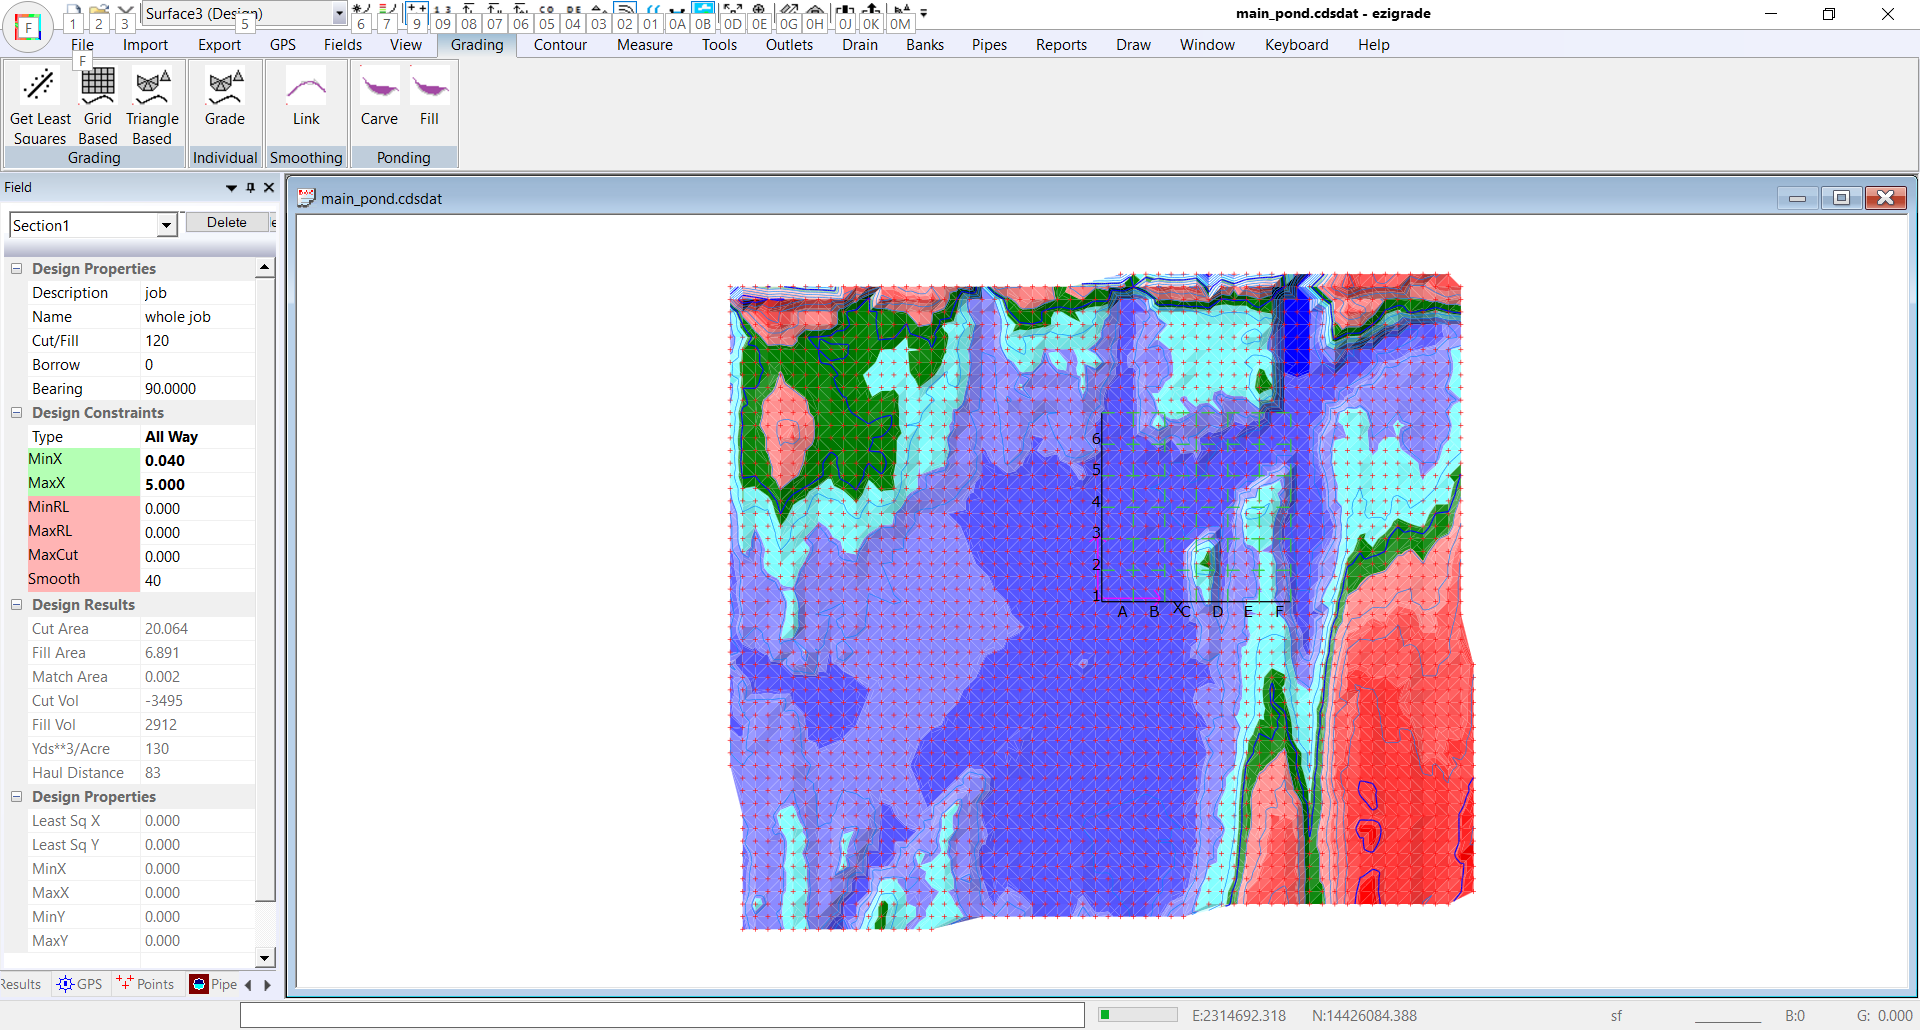
We have set the minimum grade to be 0.04% with a smoothing distance of 40 feet. If you set the minimum grade too high then you can tend to get a plane solution as it is physically impossible to get the grades to fit. We suggest that you try a solution with different values and see how the result works out. After running the solution we get the following:
In this case we have/had major ponding. The fill only solution gives a result but not necessarily ideal. Here are some numbers to remember cut/fill is -3495/2912 and 130 yds**/Acre.
 Design by Carving:
We will now try a solution where we carve out some of the major ponding areas. Click on Grading -> Carve. Ezigrade needs to do some background processing and then pops up with the following table:
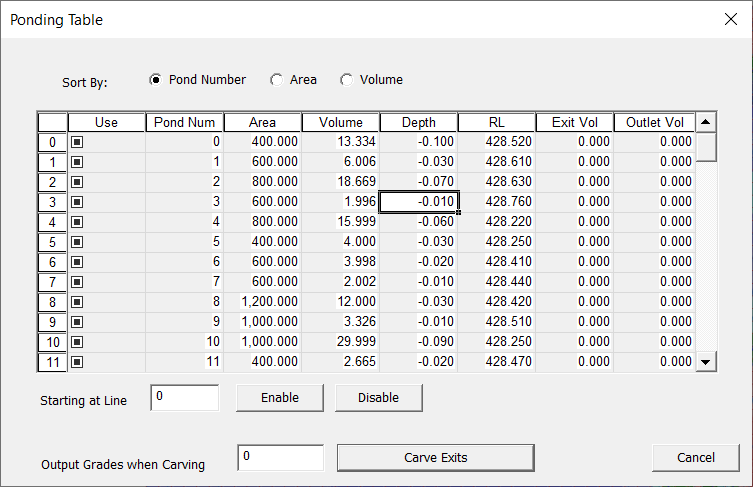
It makes more sense to sort by volume, so click on the Volume radio button.
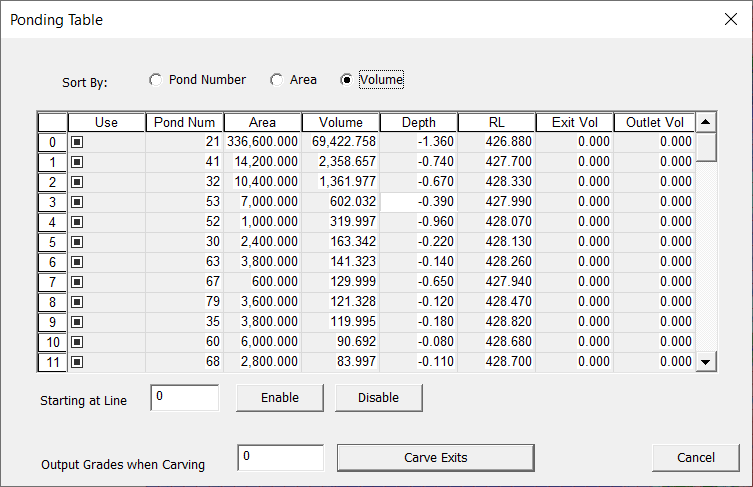
There are 88 individual ponding areas. A lot of these are trivial so we want to ignore them. Looking at the ponding surface I would suggest that 10 of the ponds are worth draining. The rest can be ignored. So I put in 10 to the "starting at line" and clicked disable.
I now click on the "Carve Exits" button and the dialog will exit. When the screen is redrawn we are shown the deepest part of the pond areas by a red circle and a green line showing the minimum carving path.
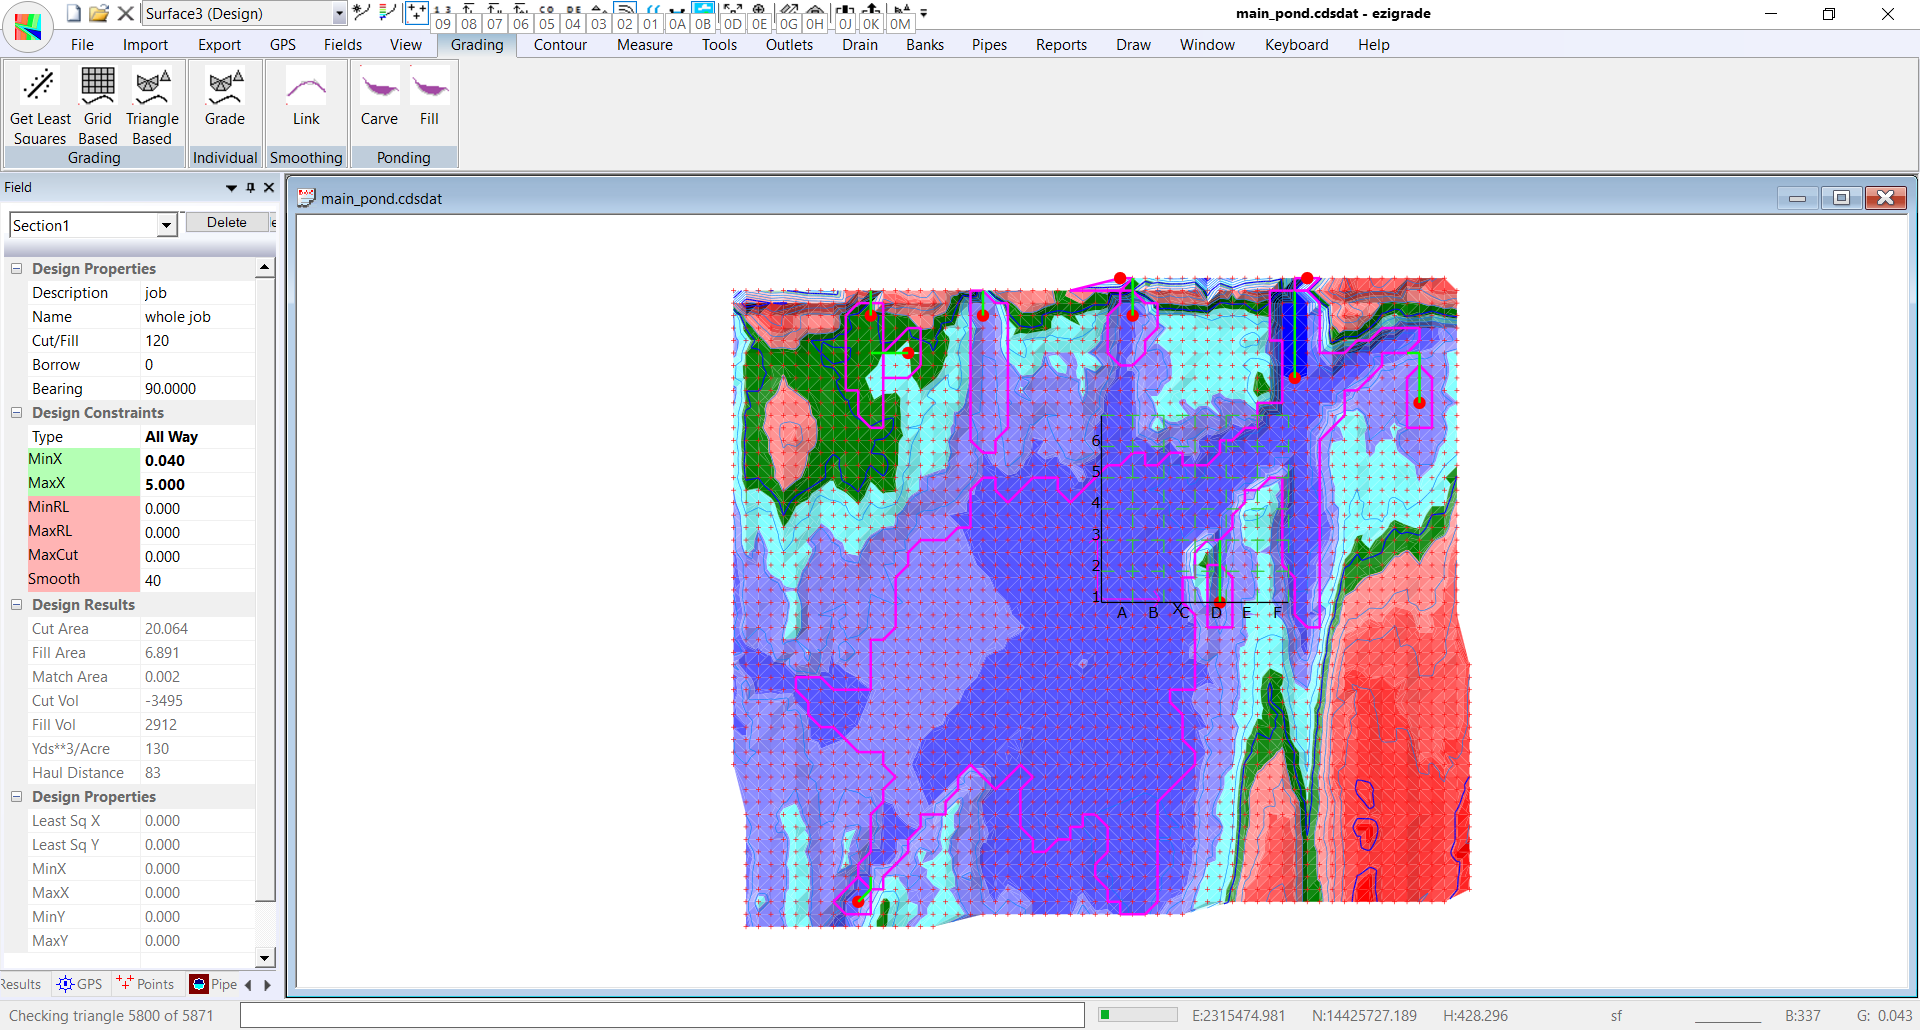
Now run the triangle based grading again. The volumes now are -896/747 and 33 yds**4/acre. So in this job it is more beneficial to carve exists rather than fill ponds. This is because we have this huge pond.
 Design with Outlets:
It is possible to improve on this result. However it takes more manual work. We can create some outlets. From the Outlet menu you can click on "Insert" in Outlet tab and click in the centre-line starting at the outlet and finish at where water first enters the outlet.
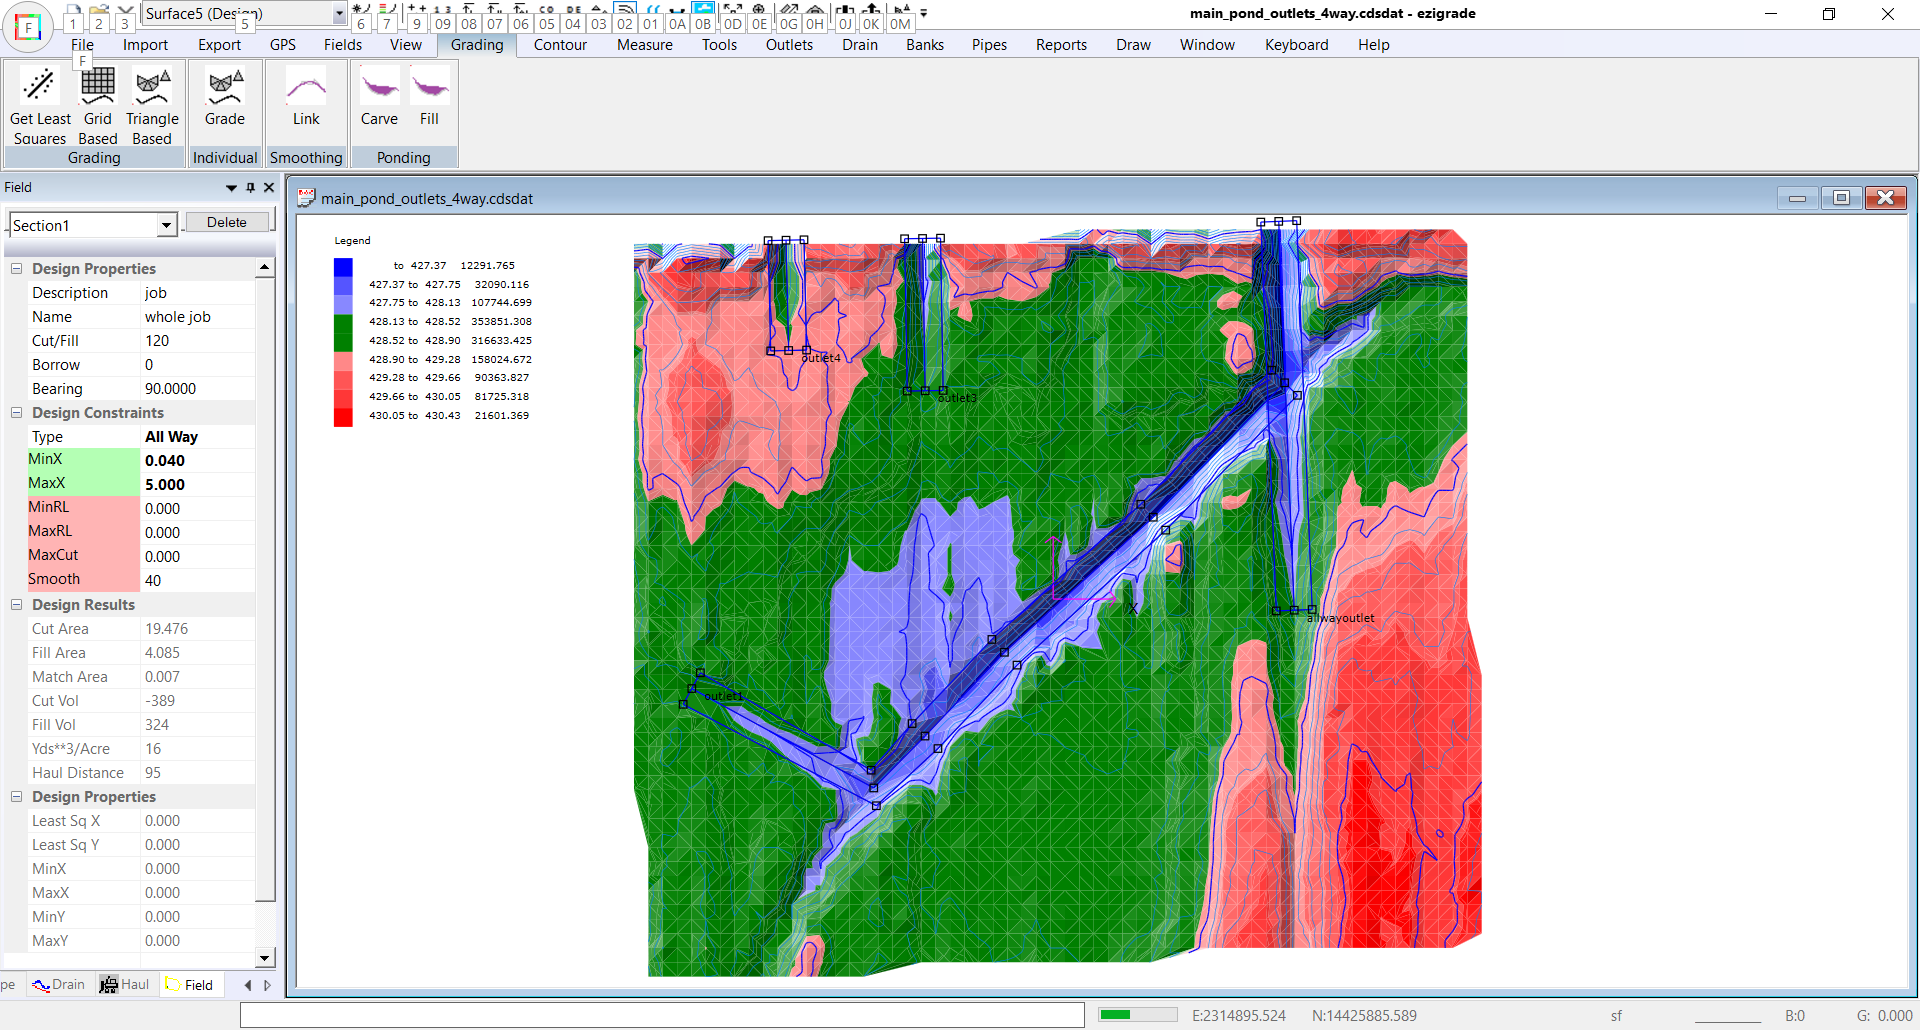
Repeat this for all the areas you want to include an outlet. In this example we have clicked in 4 outlets.
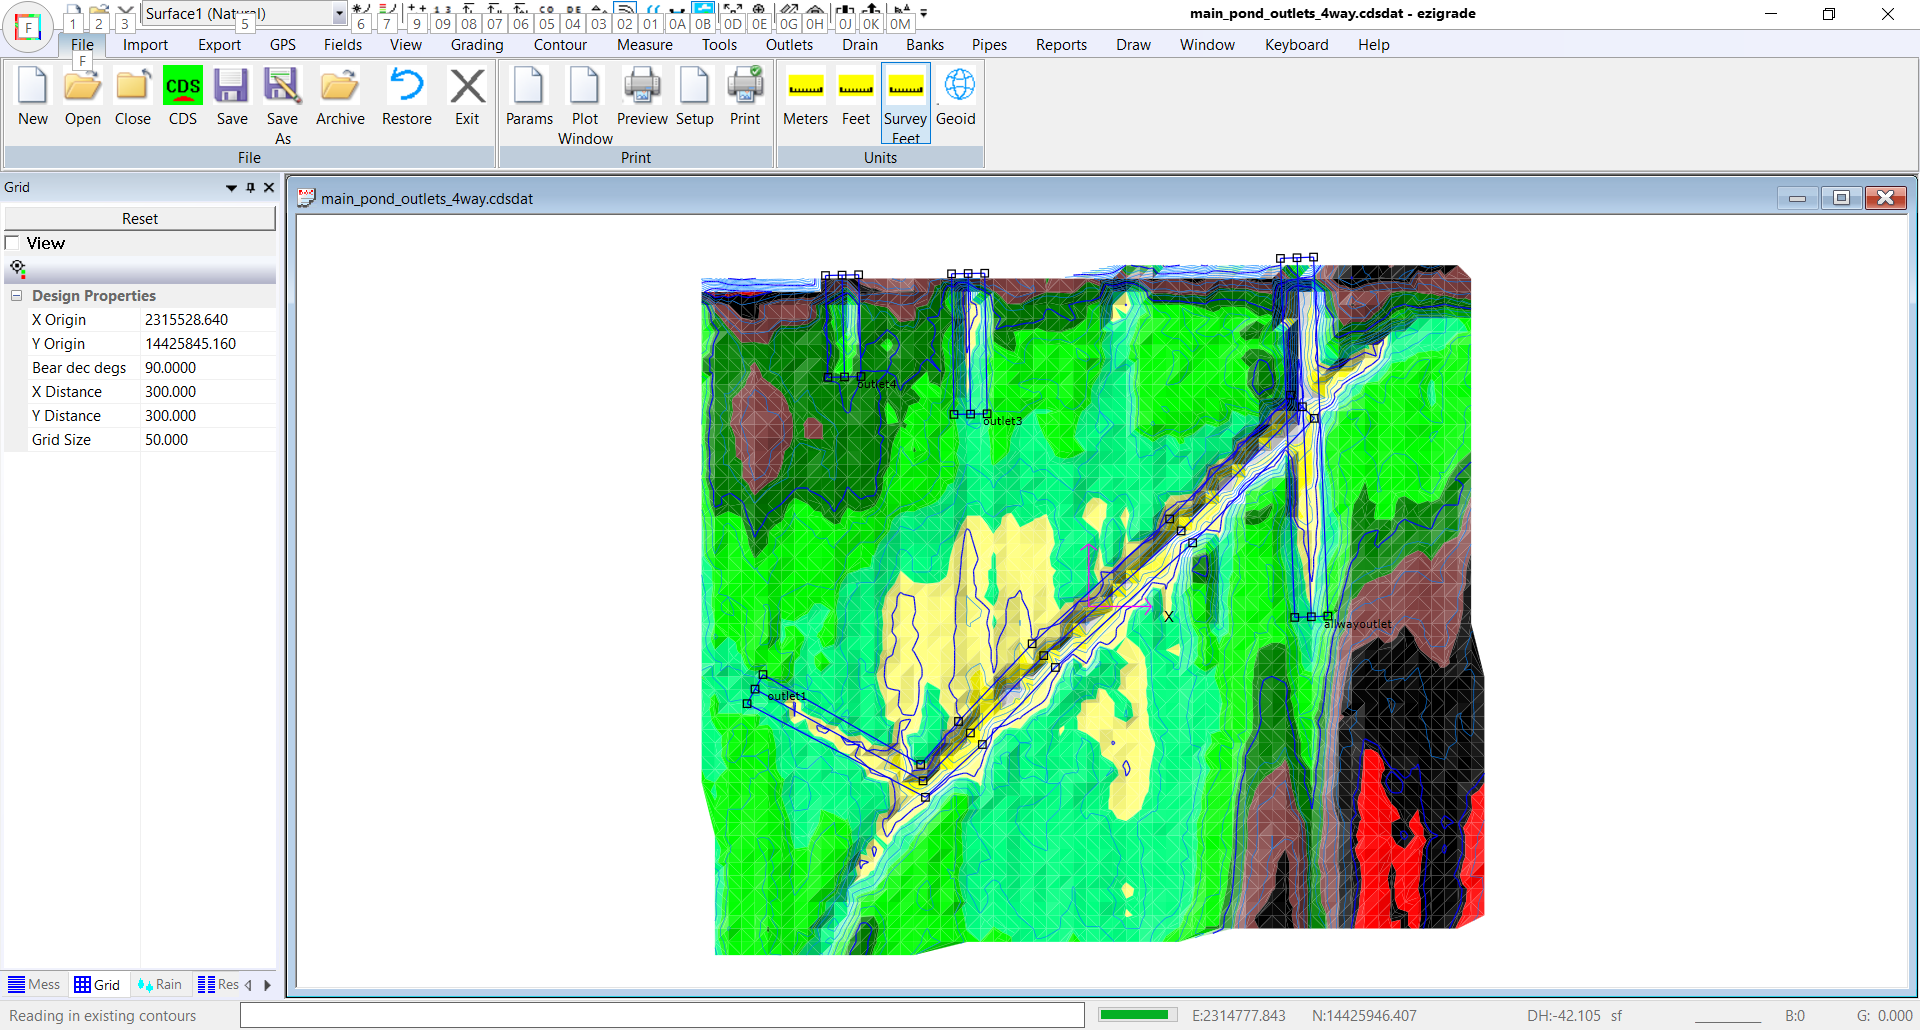
Three exist the job and the fourth joins to another outlet. When joining to another outlet make sure the start node lies on the center of the parent otlet.
We now need to define the design parameters for the Outlet. Click on the "Parameters" menu item. I have added in the following. Please note that the grades are positive as we defined the Outlet from where the water flows out of the job to where it starts. Please be aware that the inlet can also be outside the job if it is to flow through the whole field.
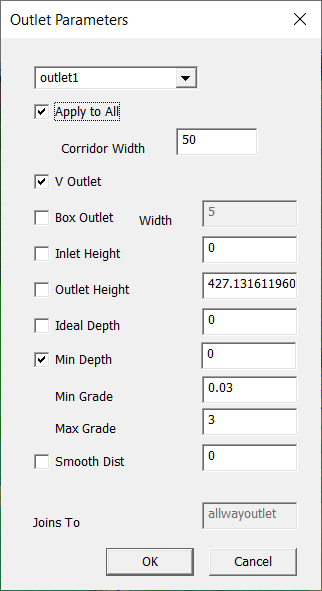
We have decided to use a V outlet . We also want to match the design surface. This is the child outlet that joins into another. It automatically creates an outlet height so things match. Tick "apply to all" and press OK. Otherwise you can design the parameters separately for each outlet.
Now also click on Outlets -> Grid All. This merges the outlets and enables the fitting algorithms to work. If you want to make changes do an ungrid, make changes and then grid again.
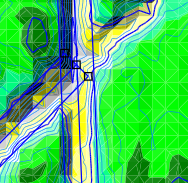
Using same parameters as before we get the following design: with volumes of -389/324 and 16 yds**3/acre.
So manually designing the outlets can still give a better result than the carving design.
|