| < Previous page | Next page > |
Creating and displaying export file.
Creating HTML file
First thing is to open up an existing CDS job. For this example we are going to open the job "estate.cdsdat" found in the documents\cds2 directory.
Open CDS by double clicking on the CDS icon. Then from the File menu - Open and browse to the documents\cds2 directory and opening the job estate.cdsdat A screen shot is shown below:
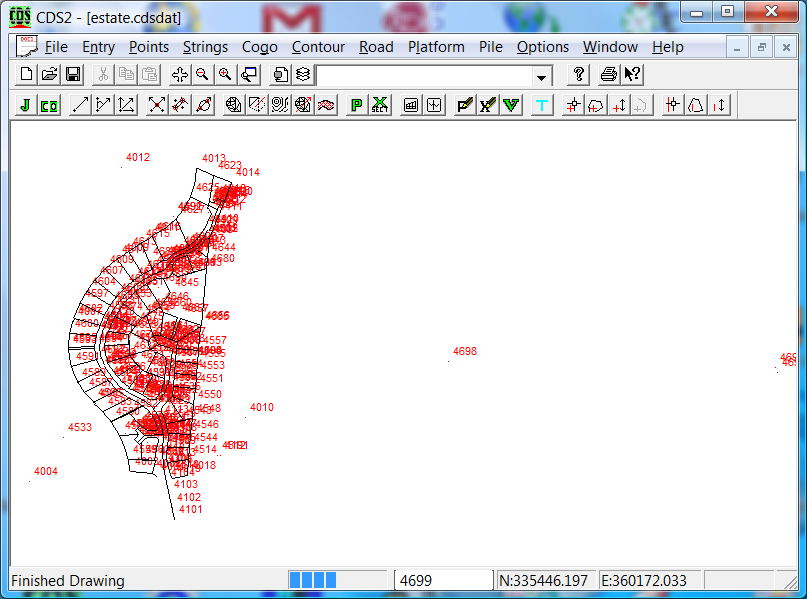
This example is a sample subdivision design and includes points and appropriate strings.
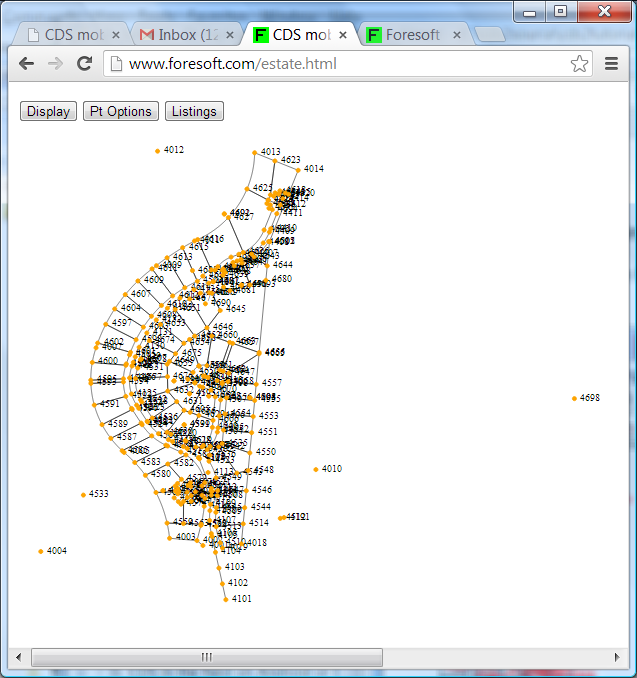
To create the export file select the File - Export HTML ( Android - Ipad). In this case we have called the file "estate.html" and we have saved it back into the documents/cds2 folder. Before leaving the office I suggest that you first test this HTML on your desktop browser. For those reading through this and haven't created your own then you can bring up the file directly in your browser by clicking on the following link. estate.html
Testing on your desktop browser
To open a local file (at least on Chrome or IE) on your desktop first click into the address bar and press the CTRL O key (ie hold down the Ctrl key and press the o key). It will open up a browser box and you can browse to the file you have just created. Alternatively click on the link above and you should see the following:
On the desktop to zoom you need to use the "Ctrl +" key to zoom in and "Ctrl -" to zoom out. On your mobile device you can use 2 finger zoom or pinch zoom.
Display Options:
If you click on the Display option then you will see options to display Points, Heights, Design Heights, Code and Description. If for example you are displaying points then clicking on heights and you get heights. If you are presently displaying points and then click points again then no text is displayed.
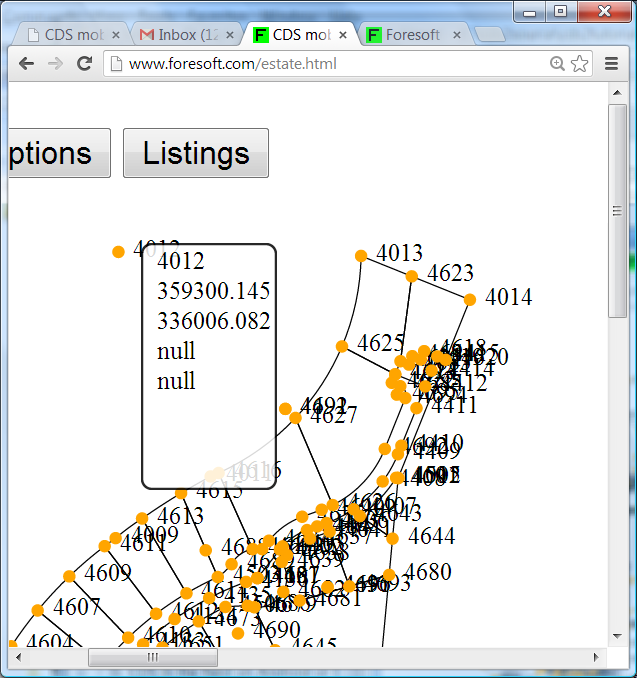
To interrogate a point simply click on the orange dot or the associated text. A tooltip dialog is displayed which shows point numbers, coordinates etc. Clicking on a new point automatically moves the dialog.
Point Options
At present the only point option is a join. If you click on the "Join" option you are first displayed with the following menu dialog:

You can type in a point number directly or simply click on a point or associated text. The menu dialog automatically displays the 2nd part:

Again you can type in or select a point or associated text. The join dialog is automatically displayed.
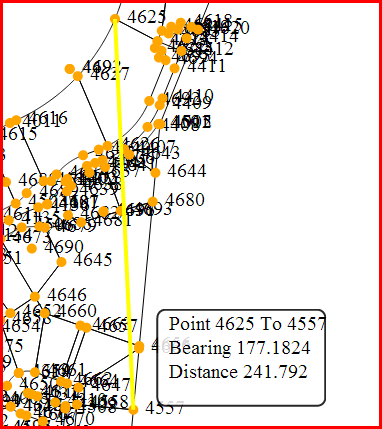
Clicking on a different point automatically displays a new bearing and distance. The bearing is displayed as degs.mmss
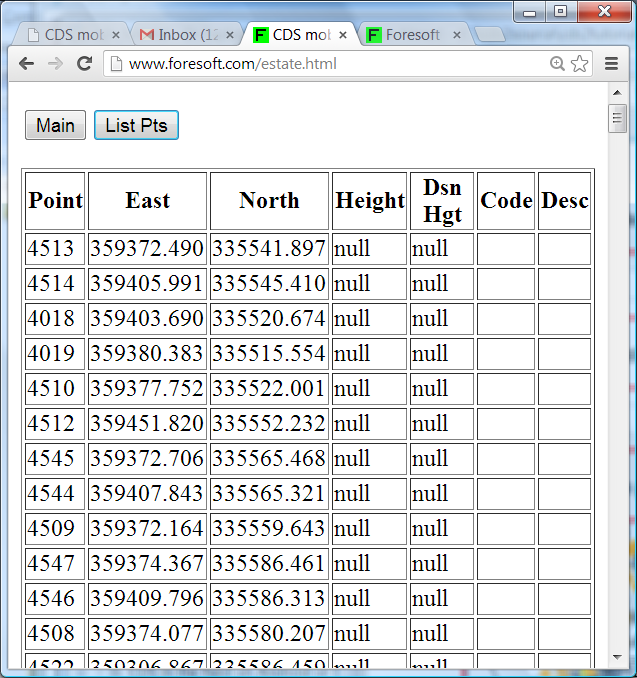
Listing:
At present the only listing option is for points. Clicking on this option and you get a display as below:
 |