| < Previous page | Next page > |
Simple Creek into HEC-RAS
In this tutorial we are going to export data of a simple creek into HEC-RAS.
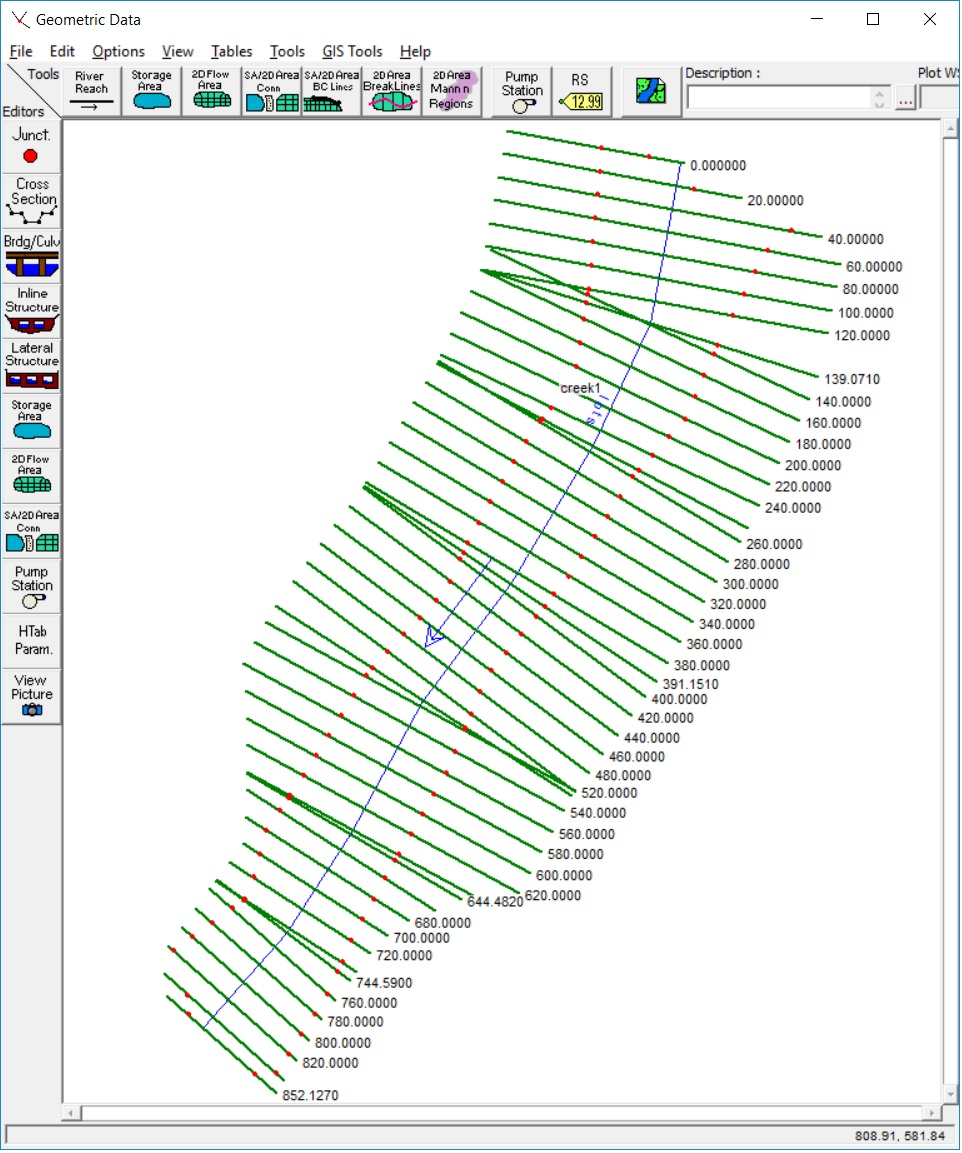
If you look in the "documents - cds2" directory you will see the file "ras1.cdsdat". A screen dump of the job looks like:
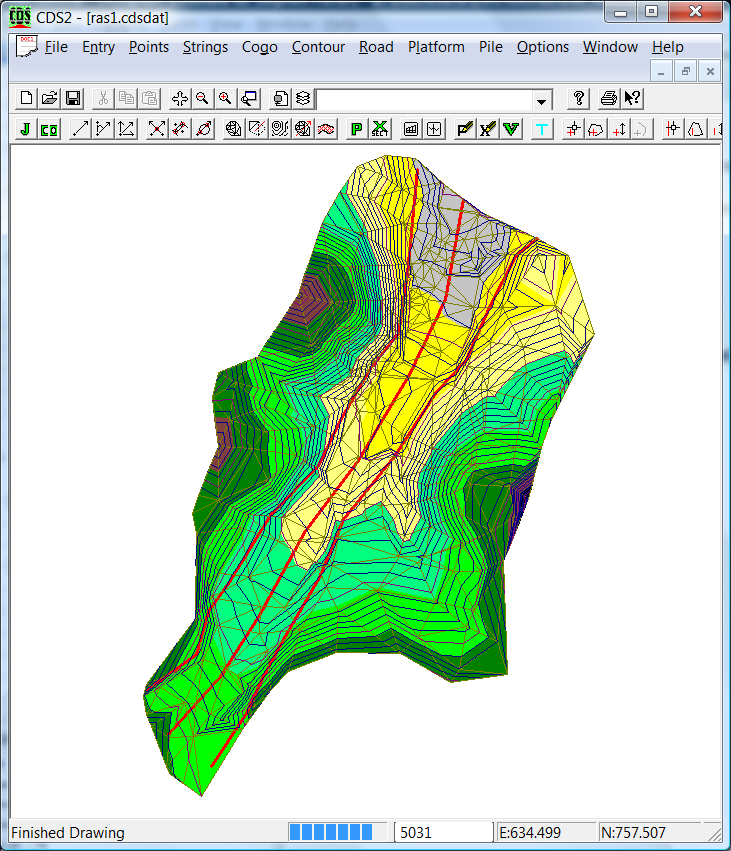
You can see three lines. The middle line defines the centre of the creek. We have also defined a line left and right of the centre line. HEC-RAS needs to know the main channel area. The main channel area typically has a different "Mannings" value than area outside the channel area. "Mannings" value is simply a coefficient value that defines the amount of roughness or friction the water experiences.
The left and right lines we have named "LB" and "RB". This allows CDS to define what we have defined as the channel edges.
If you are a novice CDS user we suggest that you read the introduction first before going any further. We also suggest you read the first section of "Using Road Design to create a dam wall" which explains in greater detail the process of creating profiles and sections.
The procedure is as follows:
(1) Left click the center string to select it.
(2) Run the "Contour" - "Interpolate Profile and Sections" menu item. This comes up with the following dialog. You need to set the distance between sections and the distance left and right. Make sure the distances left and right is wide enough to contain any water flow.
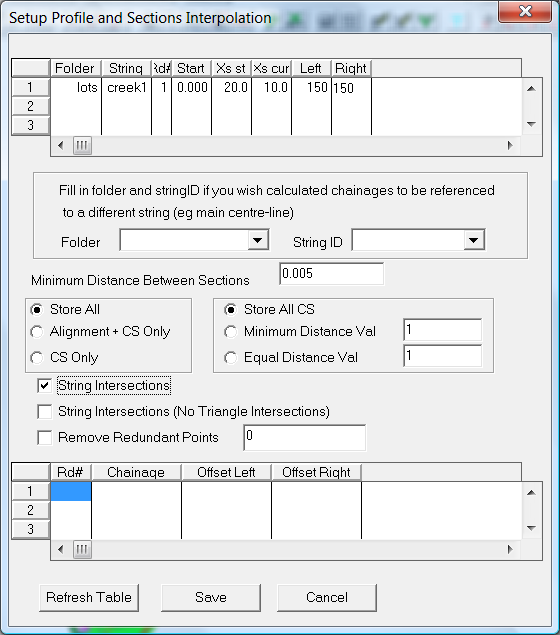
Also in this case make sure that the "String Intersections" tick box is ticked. This means that the channel edges are picked up where we intersect the left and right strings. If these are not here we put in some default channel edges; which you can fix up within HEC-RAS.
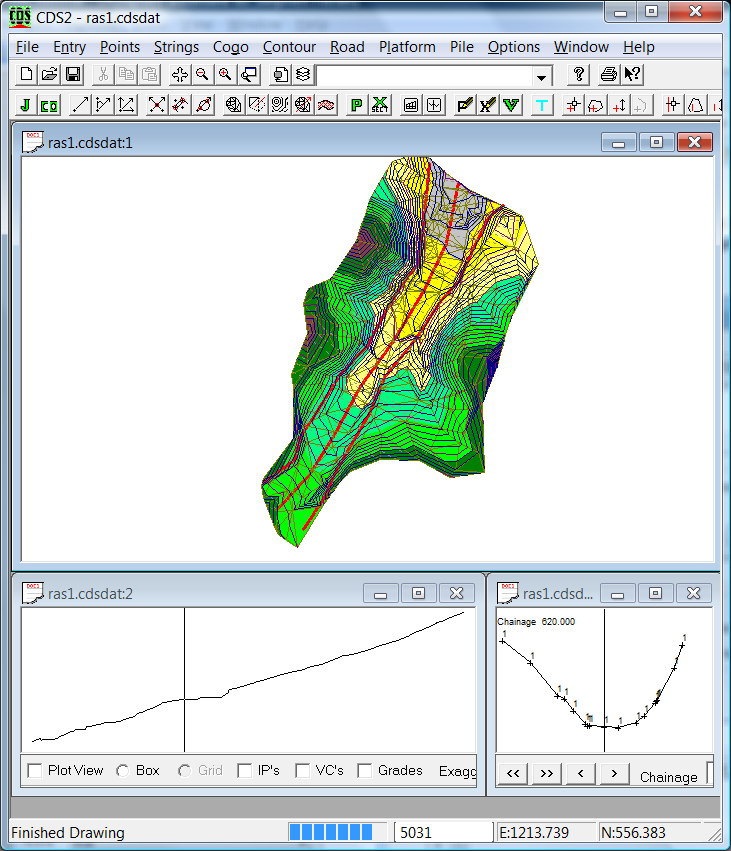
(3) Display the profile and sections views; by clicking on the appropriate icons. I would suggest scrolling through sections as a check. If you display codes you can check that left and right banks are shown. (click into section view to give it focus - then click on modes and then make sure points and codes are shown)
(4) You are now in a position to export data into HEC-RAS.
(5) Left click on the center string to select it. The export routine only exports selected strings. If you have more channels to select then left click to select as well.
(6)Now click on the "File" - "Export to HEC-RAS". Fill in the dialog. Here is a sample you can use for this job.
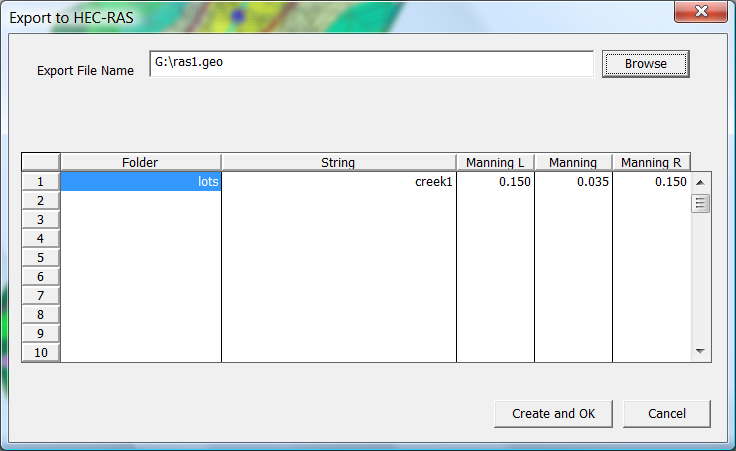
(7) Click on the "Create and OK" button and the appropriate geo file is created.
(8) We are now in a position to import the data. It is often worth looking at the file as a test:
BEGIN HEADER:
UNITS: METRIC
NUMBER OF REACHES: 1
NUMBER OF CROSS-SECTIONS: 50
END HEADER:
BEGIN STREAM NETWORK:
ENDPOINT: 897.07, 1076.97, 165.23, 5000
ENDPOINT: 490.87, 340.89, 191.02, 5007
REACH:
STREAM ID: lots
REACH ID: creek1
FROM POINT: 5000
TO POINT: 5007
CENTERLINE:
897.07, 1076.97, 165.23
871.63, 940.25, 168.85
822.34, 836.12, 172.78
752.39, 718.47, 175.58
678.47, 619.11, 179.11
616.46, 505.43, 182.81
562.41, 421.17, 186.21
490.87, 340.89, 191.02
END:
END STREAM NETWORK:
BEGIN CROSS-SECTIONS:
CROSS-SECTION:
STREAM ID: lots
REACH ID: creek1
STATION: 0.000000
BANK POSITIONS: 0.200, 0.463
REACH LENGTHS: 0.000, 0.000, 0.000
NVALUES:
0.000, 0.150
0.200, 0.035
0.463, 0.150
CUT LINE:
900.30, 1076.37
749.60, 1104.41
SURFACE LINE:
900.30, 1076.37, 163.971
897.18, 1076.95, 165.228
897.07, 1076.97, 165.227
867.17, 1082.54, 165.113
863.33, 1083.25, 166.046
846.78, 1086.33, 168.368
830.47, 1089.36, 169.005
814.90, 1092.26, 171.641
813.65, 1092.49, 171.760
813.13, 1092.59, 171.835
812.34, 1092.74, 171.963
775.58, 1099.58, 176.226
758.71, 1102.72, 177.368
749.60, 1104.41, 178.548
END:
(9) We are now in a position to open HEC-RAS. As mentioned before you really need to read up the HEC-RAS documentation now. This is a different package not written, sold or supported by us. However as a guide you can do the following to import this data.
(10) Click on the HEC-RAS icon to open the program and create a new job.
(11) Now click on "Edit" - "Geometric Data"
(12) With "File" - "Import Geometry Data" and click on "GIS Format". You will see that some of the sections intersect each other. At present we suggest that you remove the conflicting sections within HEC-RAS. We intend to test for this within CDS but this is still a work in progress.
(13) Close the Geometry Editor.
(14) Click on "Edit" - "Steady Flow Data" and fill in a water flow and a downstream boundary condition. In this example I have set water flow to 400 meters cubed per second. Have also set the downstream boundary condition to "Normal Depth" and downstream slope of 3%.
(15) Click on "Run" - "Steady Flow Analysis". Assuming you have no warnings you can then display outputs etc.
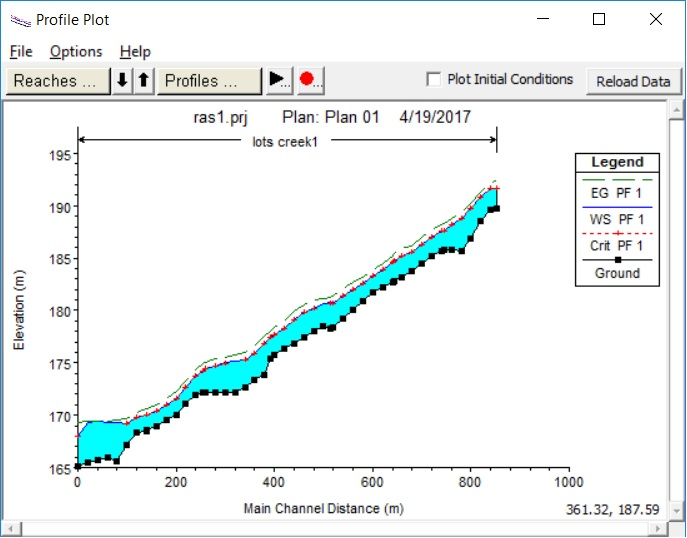
(16) Click on "View" - "Water Surface Profile" and you have the following profile along stream centre line.
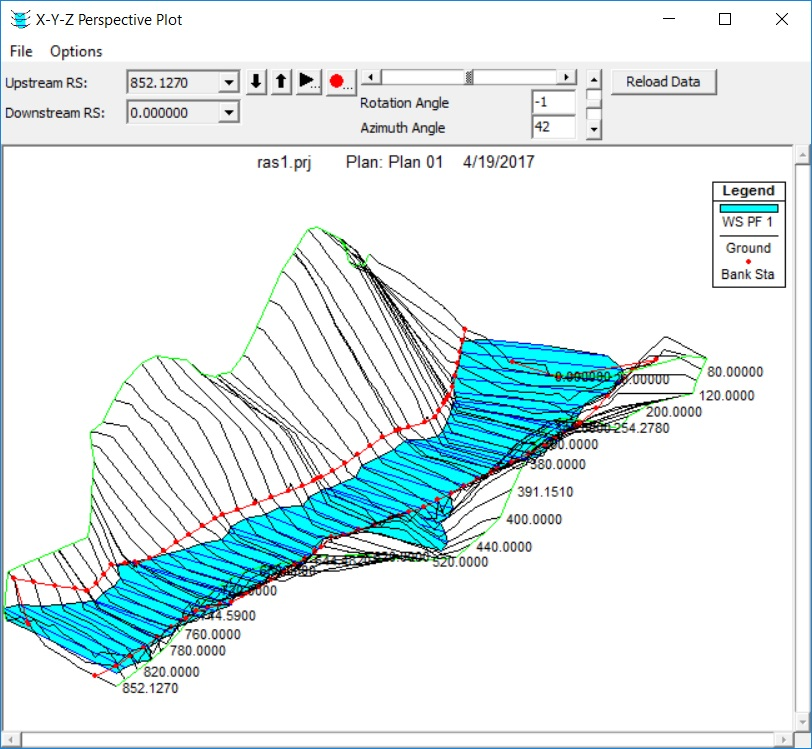
(17) Click on "View" - "XYZ Perspective Plots"
This is the end of the Tutorial.
|