| < Previous page | Next page > |
|
Digitizing with CDS
Before we start digitizing we need to have the relevant Wintab driver loaded for our particular digitizer. All modern digitizers ship with a Wintab driver. Check for any software that shipped with the unit. This Wintab driver allows the driver to communicate with windows. If the digitizer will work initially under windows it will not work under CDS. If you can't find the driver it is worthwhile doing an internet search.
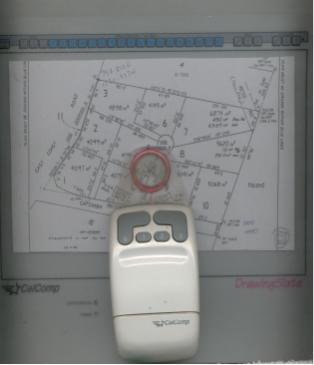
You use this button to swap the puck between being a digitizing puck and being a mouse.
The cursor will be an x inside a circle when it is acting as a digitizing puck, and will be the arrow, or you normal mouse cursor when you have it in mouse mode.
When you get into CDS, and select digitizing, the program will set the input to be from the 'puck'.
If you need to select menu items etc, you can then click the 'right mouse button' to turn the puck into a mouse.
Once you have finished picking menu items or whatever, you can click the 'right mouse button' again to revert to it being a puck.
Configure Digitizing
Before you can digitize, you need to have at least two points on the plan with known coordinates.
It is preferable is these points are located at opposite diagonal corners to one another.
You may use more than 2 points if you wish, but you MUST have at least 2 known points.
From the CDS menu select Entry =>Digitizing => Configure Digitizing.
You will see that the cursor on the CDS screen changes to show an x inside circle
This indicates that your digitizer is communicating.
However, at this stage the program has no idea of how to relate the tablet to the screen area, so you will need to 'work blind' until you get the control points into the system.
At this time forget the screen, and concentrate entirely on the plan on the Tablet.
Position your Puck over the First Known point and 'pick it'.
Pick First known point
Window appears asking for E & N of point
Note cursor goes back to pointer, which means you can use your mouse to select options.
Enter in E N, then click Next.
Note the field named 'Tolerance' .
If you intend to 'trace' lines such as contours on the plan then you need to decide how far apart you want points collected as you move along the line. So, if you think that you want the points to be no clod\ser than 5 metres together, you would set a tolerance of 5.
The default value of 2 will be OK if you don't know better, but it will tend to collect masses of points and potentially 'bog' the processing at a later stage.
The cursor will again change to an x inside circle, and again you should forget the screen and concentrate on the tablet while you position the puck over the second point with known coordinates, and pick it.
Now enter the values for East & North of the 2nd point.
Now click finish.
Digitizer is now calibrated and ready to digitize.
If you move the puck on the board it will trace out on the screen.
If you Pick a point on the plan, that point will be numbered, coordinated and stored in the database.
Digitizing Points Only.
Digitizing Spot Heights
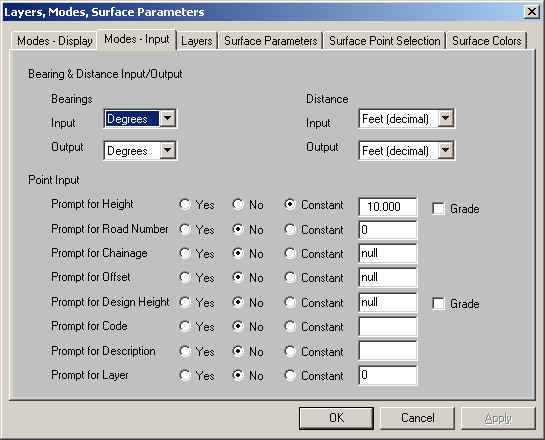
If you wish to enter spot heights, you should first call up the Modes Input Screen.
Either use the mouse to pick the Modes icon, or use the F10 key to bring up the Layers, Modes, Surface parameters Screen.
Choose the Tab "Modes - Input" You will be at the tabbed dialog entry as below.
You can now ask the program to prompt you for additional attributes each time a point is added, or you can set it so that a constant attribute is added to a sequence of points.
For example, with "Spot Heights" you would select the 'Yes' button adjacent to Prompt for Height.
Now when you digitize a point the Points Add/Edit window will appear to allow you to enter the height of the point.
Digitizing Strings.
If you wish to add in the strings as you digitize the Points, you should Select Strings =>Add to bring up the 'Add Strings' dialogue box.
Enter the relevant String Id, and any other information you require.
Then simply commence digitizing the points around that string.
You will see that as you pick each point it is added into the string definition, and the line is drawn on the screen as you proceed.
When you have finished all the points, use the Mouse to select either the Apply button if you wish to digitize more strings, or the Finish button if you have finished with strings for the moment.
Digitizing Contours
If you have a plan with contours on it and you wish to digitize them, first you need to stop and think about it.
CDS is designed to form contours from random points collected in the field.
So, if you have a plan with contours at a 1 metre interval, you do not and Should Not digitize each and every contour.
Depending on how regular the contours are, you might choose to digitize every even 5 metre, or every 10 metre contour.
Once you have decided which contours you wish to 'trace', you should call up the Modes Input screen and set the Height to be Constant with the value of the contour under consideration.
Once that is done, position the puck over the start of the contour, hold down the pick key, and simply follow the contour.
Points will be collected in a 'stream' as you move the puck along the plan.
The distance between the points is determined by the 'Tolerance' value you set when you entered the Control Points for the job.
|