| < Previous page | Next page > |
Creating Job suitable for ePlan export
Please note this is preliminary documentation. We are working on documentation and program at the same time to get a hassle free outcome as possible.
If you have any comments or idea's for helper functions then please let us know.
CDS has simplified as much as possible the procedure to create a compatible Eplan XML file. We suggest that you have read the two previous tutorial pages. The basic procedure is to setup any needed points on there respective layers; and any needed strings into there appropriate folders.
The Points and Strings also have attributes associated with them that need to be set. CDS has some helper functions that fill in the attributes as best as possible. However there are some settings that still need to be done manually. For example; selecting the type of an existing monument.
You can refer to our example job which shows the appropriate layers for Points and the appropriate folders for Strings.
Setting up an example job.Setting up Strings.
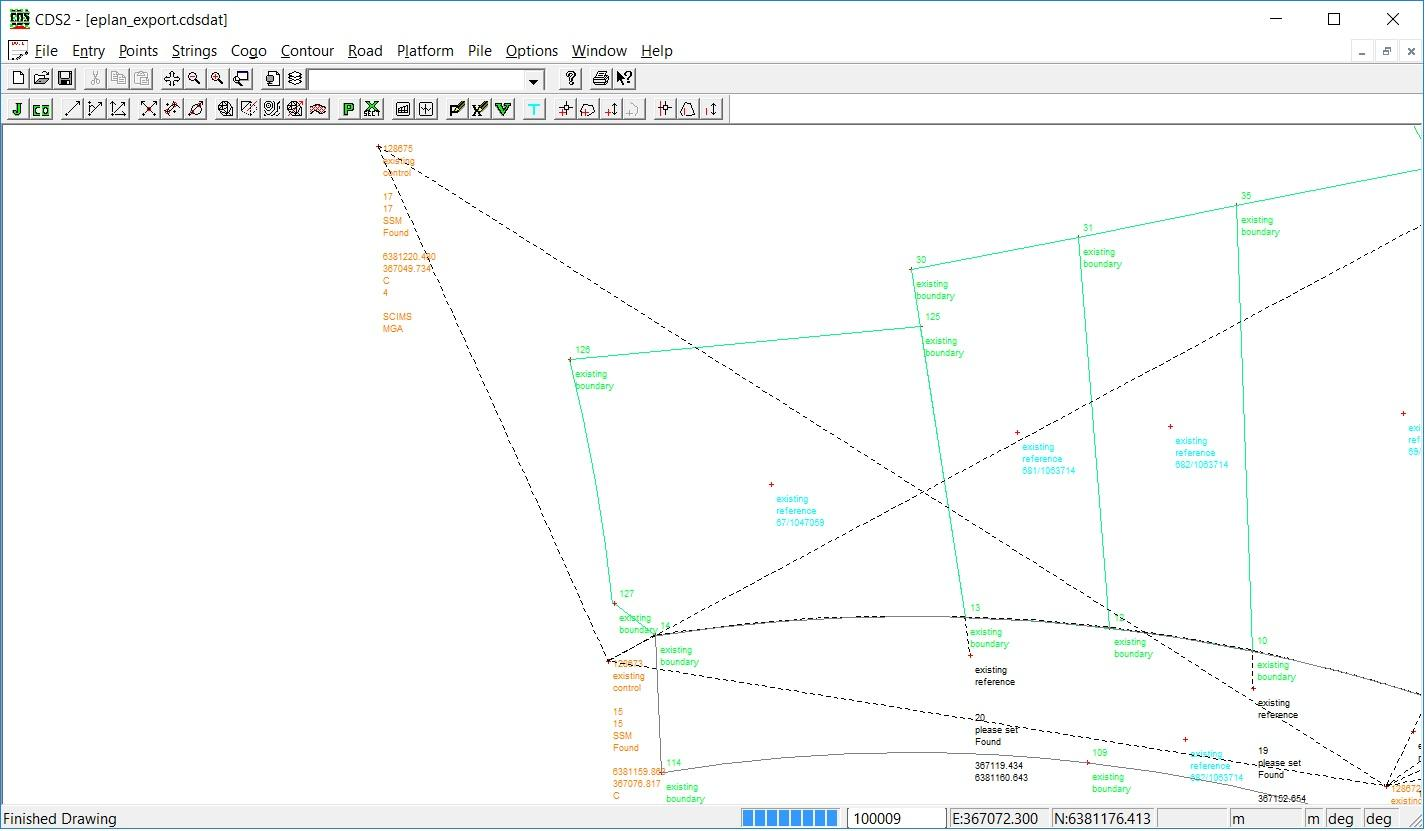
We will use our previous example on how to setup a job. In this case we have removed all associates and started with all the points on layer “0” and only one default folder. We will outline the steps needed to massage the data into an appropriate form. The screen shot below shows the job with points and strings only. There are no attributes or any reduced observations.
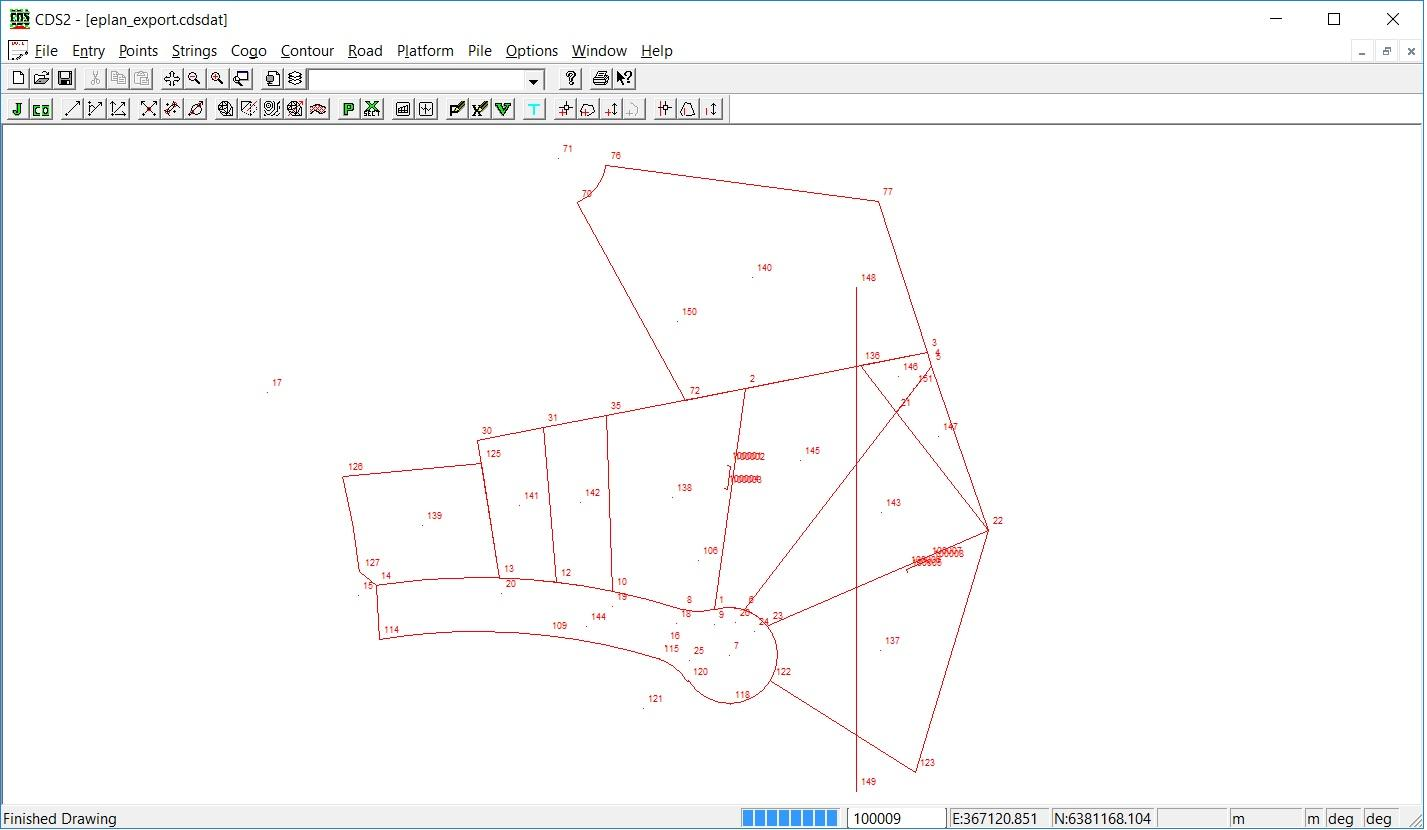
The subdivision consists of two lots. The points 143 and 145 are in the center of the respective lots. At the top right we have an area that is included by these two lots but we are restricted on what we are allowed to do here. All the other lots are existing lots.
CDS uses the folder that the string sits in to decide which attributes need to be set. At present the following folder names are predefined:
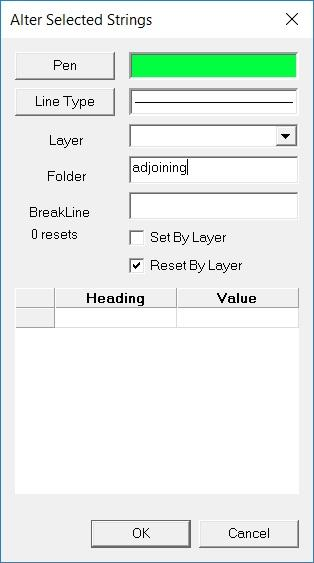
We are going to classify our strings by placing them in there appropriate folder's. Most of the strings displayed could be classified as “adjoining”. Select each of these folders respectively either by left clicking on them, select by polygon etc. Now right click on the screen and select the “Alter” menu item. I have filled in the following details. Please note that I have ticked the “reset by layer” tick box. This way the color selected will be shown rather than using the default color associated with the layer.
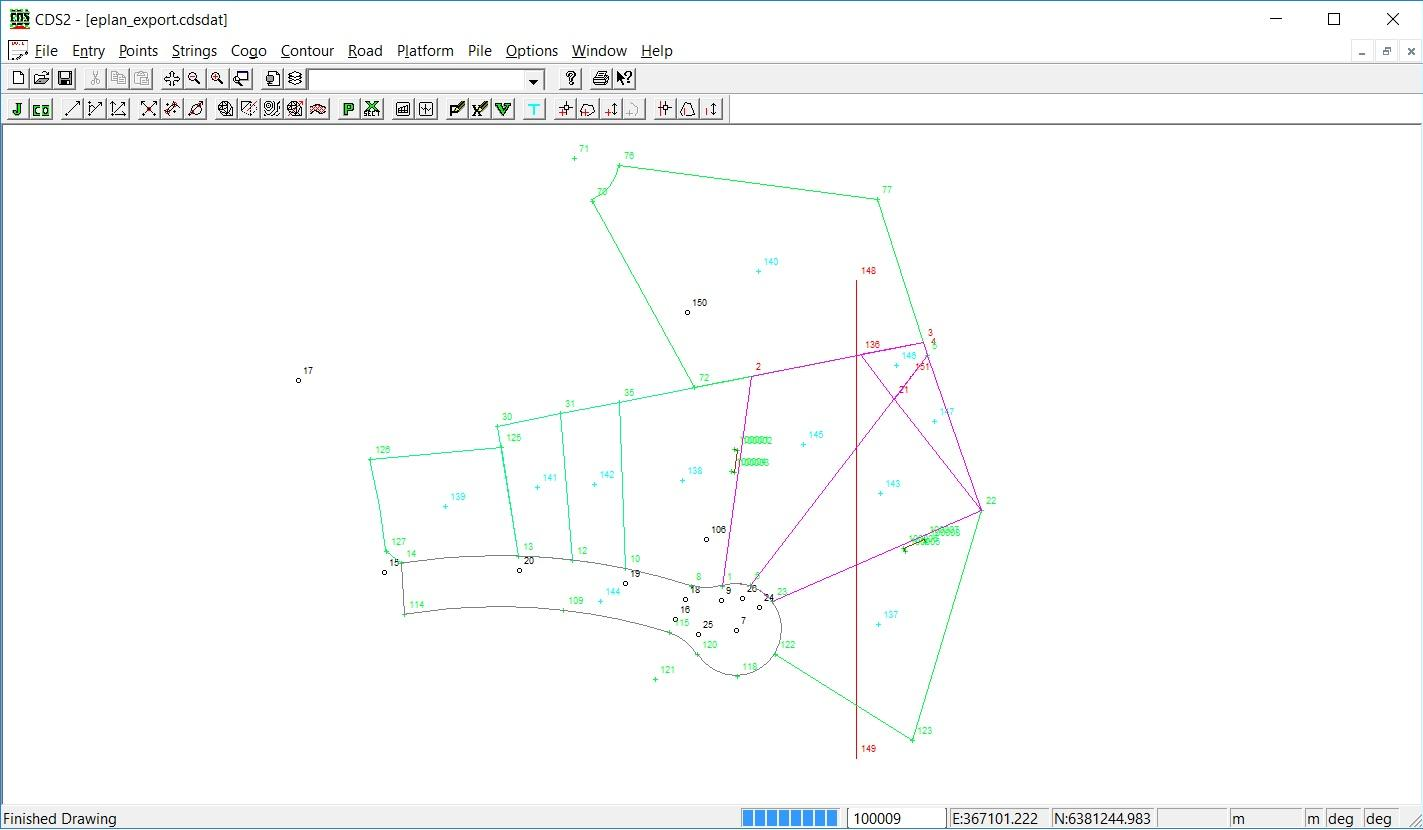
In a similar way select the appropriate strings and place them in there respective folders. In this example we want to sort the strings into the appropriate folders. I have done this here and color coded them so we can see what we have.
Setting up Points:
For the points; CDS uses the layer of the points to decide how they are to be used. At present we are using the following layers:
In the example shown we have set the appropriate colors to:
• existing to green
• proposed to magenta
• center to cyan
• reference to black
 Reduced Observations
These relate back to our survey shots. They help reference our proposed lots back to existing monuments. We need survey shots along any proposed edges, as well as shots that tie these shots back to our fixed points. These reduced observations are placed in the “reducedobservation” folder and can consist of either a shot which is entered as a string with 2 points; or alternatively as an arc.
In my example I have set these reduced observations to show as black dashed lines.
Here is a screen shot of the reduced observations; they are the black dashed lines. You will notice the connections as well as the reduced observation shots around the proposed lots.

There is a helper function to auto-create reduced observations along any proposed strings.
Click on the "File → Exports → Export ePlan → LXML → NSW → Create Observation Strings.
We also need to add in any shots that tie the monuments back to the proposed strings. We can add in the following observations: 17->15, 17->16, 15->16, 15->2, 19->10, 20->13, 19->10, 16->18, 16->1, 16->6, 16->23, 25->23, 18->8.
Run the "Create Observations Strings" function again and the strings will be numbered correctly.
The function that creates the xml uses these folders and layers to help in the process. However it also needs some extra information for nearly every single point and string. These extra bits of information are set in what we call attributes.
For points; every attribute present in the database has an entry for every point. If an attribute is not relevant for the particular point and it's function; then for this point it can be empty. For strings; the list of attributes can vary per string, so we only need the appropriate attributes set for each string.
Once we have the points and folders set up we can run a helper function that set's up all the point and string attributes; and fills them in as completely as possible for the information known. This function has been designed so that it can be run over and over again; without destroying attributes that have been modified.
Click on the “File → Exports → Export LandXML → NSW → Set Default Attributes” menu item.
The attributes have now been partially set. When running it gives a dialog on what has been set. If a certain attribute has not been sent then it gives a little prompt on what you need to do.
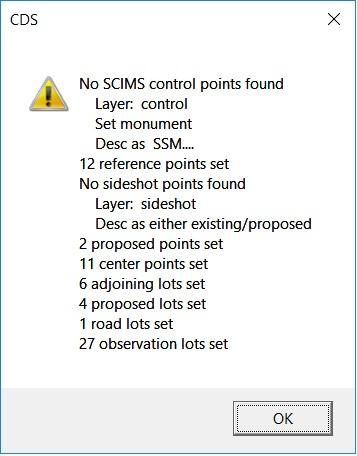
For example here, it tells us that no SCIMS points have been found; and tells us they should be on a layer of “control” and set as a monument with a description that identifies the SCIM point id. In this job the control points we have overlooked are points 15,16 and 17. Select these points and then right click and alter. Set the layer to “control” and make sure the “monument” tick box is ticked. We need to set the individual id's for the scim marks. In this job:
pt 15 corresponds to SSM128673
pt 16 corresponds to SSM128672
pt 17 corresponds to SSM128675
So to set point 15 right click on point15 and set the description field to SSM128673. Repeat for point 16 and 17 with respective ID's.
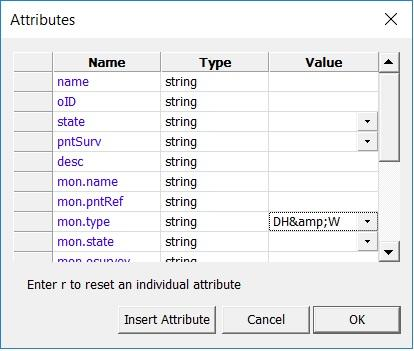
At this point it is worthwhile displaying the attributes to get a feel for where everything is:
We now need to modify individual attributes where necessary. If you look at some of the reference attributes you will see that the monument type says “please set”. CDS at this point has no information it can use to set this attribute. You can go through each point in turn at set appropriately. To speed things up a bit you can set more than one point at once. For example here; left click on points 19 and 20 to select them. Now right click and “point alter”. Here we are only changing an attribute. Click on the attributes button and fill in the monument type (mon.type) and set it to “DW&w” from the drop down menu
Repeat for all the points as necessary.
We now need to check the strings. I would suggest you turn off the display of any point attributes and then under string → attributes display the attributes.
Visually check them for consistently. To change an attribute you can right click on the string and modify the appropriate attribute.
|